RetroArch Slowstart Guide
Part 1: Background
RetroArch is a frontend for the the libretro API. The idea behind libretro was to separate the higher level tasks of an emulator such as the video drivers, the configuration, input, etc. from the actual emulator itself. A libretro core will, for the most part, only handle actual emulation.
Before libretro every emulator needed to handle everything on its own. This overcomplicates things because it means every single emulator would need its own implementation of everything and they were almost guaranteed to be different, it was unlikely that your NES emulator would handle input the same way as your SNES emulator. It was possible that your GBA emulator would support a graphics API that worked well with your GPU but possible or even likely that your n64 emulator would not. Your GameCube emulator might have a great UI that is easy to use with a controller, but your PSX emulator would need a keyboard and mouse. Your SNES emulator is likely very mature and feature rich, but your Sega Genesis emulator could be barebones and lack quality of life features other emulators have.
Libretro cores have, except in special circumstances, none of these features. They are all equally dumb. Instead these features are handled by the frontend. Since all libretro cores are equally dumb, any frontend that can use one libretro core can use them all. And so, if your frontend has one feature, that means that all of your libretro cores have that feature and that that feature can be set once in the frontend and apply to every core.
There are several libretro frontends but the main, most common, and most used frontend is RetroArch. RetroArch has been developed alongside libretro from nearly the beginning. For most people libretro is RetroArch and RetroArch is libretro. RetroArch is by far the most feature complete frontend.
RetroArch and libretro, as a result of being developed together by mostly the same developers, both follow the same design philosophies. They are free, open source software. The vast majority of both are written in highly portable C, with the goal of having them run on all kinds of hardware and software. RetroArch and libretro cores can be built and run on Windows as well as Linux, but they can also run on x86, ARM, or even more exotic hardware. They can be built for Windows 98, Android or iOS, or even more obscure operating systems like QNX.
This guide though is for a standard x86-64 install on a modern Windows machine.
Part 2: Initial Preparation
First download the current stable Windows build of RetroArch from https://www.retroarch.com/?page=platforms
On a modern Windows computer you will want the Windows Installer (64 bit)
Run the installer, the default install location is C:\RetroArch-Win64, you can change this but do not put it in Program Files, Program Files (x86) or any other protected folder on Windows. Modern Windows (since Vista), limits write permissions in these folders which can cause a problem later when RetroArch needs to be able to write to its own folder.
Now that RetroArch is installed we need to add bios files to it. Some emulators need a bios from the original console to run. These are not included with RetroArch for copyright reasons.
Download bios files here
Open the directory you installed RetroArch to. For the sake of this guide we will assume C:\RetroArch
Open the subfolder in C:\RetroArch\system and copy the extracted contents of the rar file we just downloaded to it
First Run
Now we’re ready to run RetroArch for the first time. run retroarch.exe it will load RetroArch with the default UI “ozone – black basic” which is likely what you’ll want to use on PC anyway.
At this point RetroArch will generate the default configuration, this will be a file called retroarch.cfg, this file is very important and, technically, can be edited manually to change almost anything about the way RetroArch runs. You’ll know this was successful because RetroArch will notify you of it. The only way this could fail is if we installed RetroArch to a folder it does not have permission to write to.

Almost every setting you change in RetroArch will write to this file. Importantly, RetroArch does NOT automatically save configuration changes to this file, by default we will have to manually save. This is not ideal, luckily we can change this behavior to save configuration on exit. Though it is a good habit to manually save changes, especially when you are changing many things, in case RetroArch does not shut down properly for some reason. So we will set that first in the “Settings” panel
Right now we are using keyboard controls, Enter moves forward a menu and confirms changes, backspace goes back, esc twice will close the program.
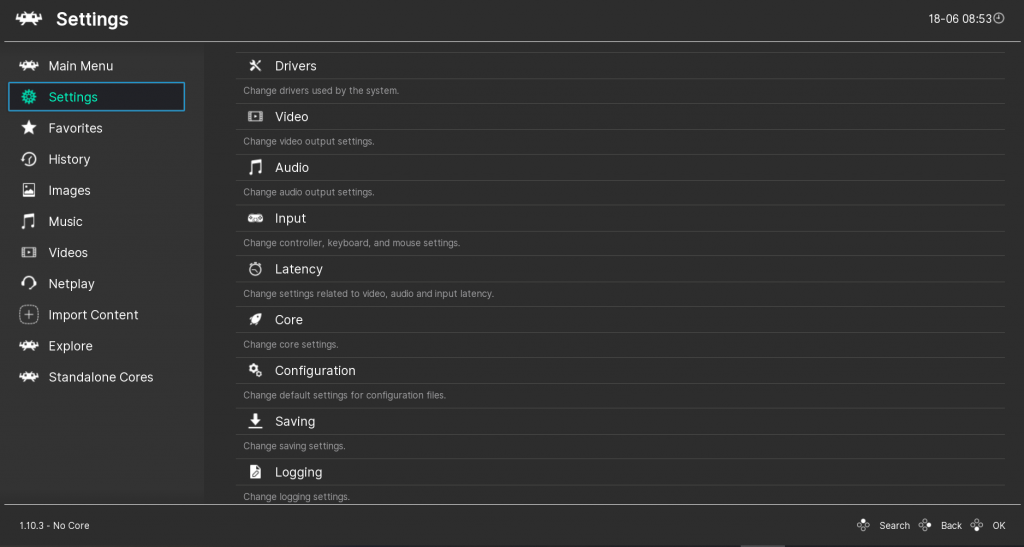
Navigate to Settings > Configuration and set the following two options;
Configuration > Save Configuration on Quit – On
Configuration > Save Remap Files on Quit – On
Return to Main Menu > Configuration File and select Save Current Configuration
Part 3: Basic Configuration
Joypad controls
Plug in your controller and go to Settings > Input
For joypads RetroArch will use the X Input controller driver by default. Input type can be changed in Settings > Drivers > Controller but the only two relevant input drivers for Windows are xinput and dinput. Xinput recognizes all controllers as xbox 360 controllers. This likely does not have to be changed at all. Xinput has far better compatibility and is the newer standard. Xinput maps triggers as axis though which can matter. This is more useful to know for other emulators that handle this poorly like some standalone builds of Snes9x which have trouble with L+R mapped as axis.
dinput is still used by default for keyboards though.
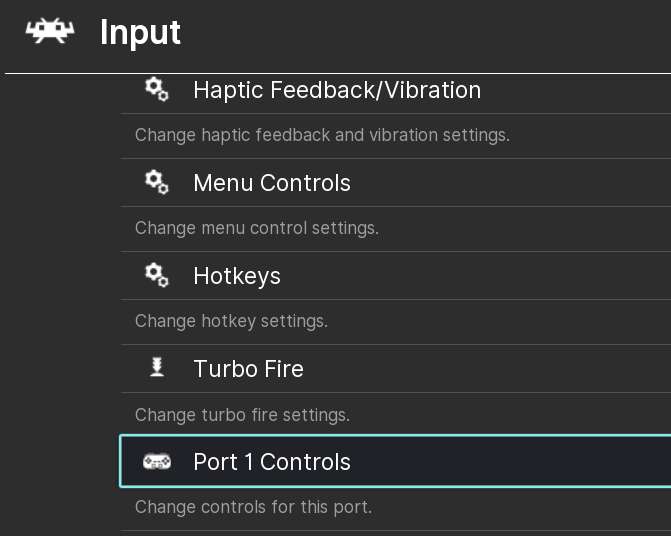
First setup player 1’s controller in Settings > Input > Port 1 Controls
Hopefully the controller is automatically detected, though if you have more than one controller connected you may need to specify the device to use with the “Device Index” option. Left and Right on the keyboard to find the device, then we move onto setting each key. The controller may automatically “work” with an autoconfig profile, though manually setting everything doesn’t take long and is a good habit to be sure things work the way you expect them to.
It’s important to note RetroArch buttons may not match the button layout of your controller. With RetroArch you are configuring an abstracted, virtual controller called the “RetroPad.” This generally follows the Nintendo controller layout, not xbox. What this means is, to the RetroPad, the B button will always represent the bottom left button to the emulator core regardless of what the B button is on your controller. If you configure B to be the actual B on an xbox controller your buttons will be in the wrong place.
This configuration will not be completely universal for all cores though, later we will reassign some keys with Remaps for consoles where this control scheme doesn’t work very well.
Next we will set up controller hotkeys in Settings > Input > Hotkeys
We can now navigate with just the controller, from this point on we probably won’t need to use the keyboard anymore except for very specific situations, especially after we finish configuring hotkeys.
For hotkeys, not all of these will need to be set. It will depend on which games you want to play and which features you need. Rarely used buttons like “Next Disc” are better set with keyboard inputs
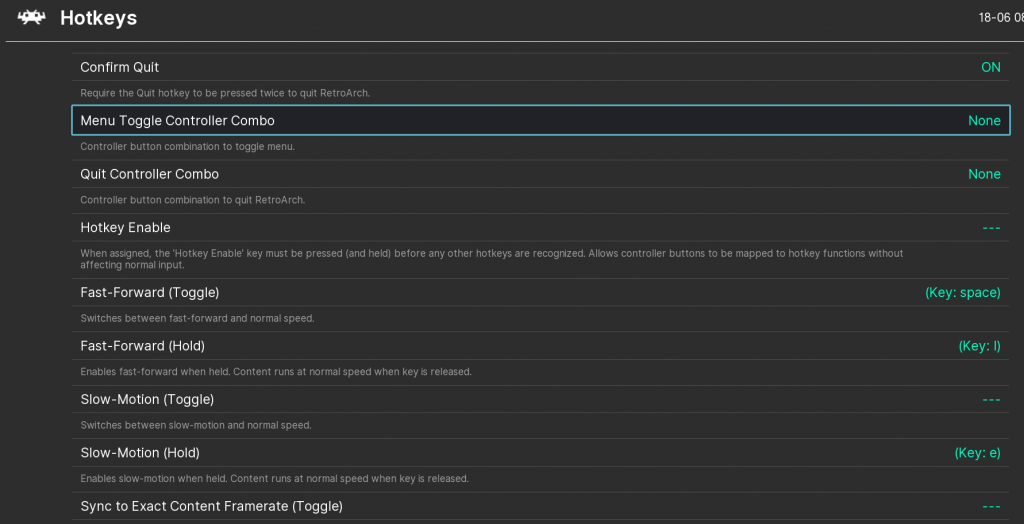
First set Menu Toggle Controller Combo – When we’re in a game we’ll need to go back to the menu to do some things like save state, load state, switch games, etc. To do this we’ll use the button combination you select here
Hotkey enable – This is the button that must be pressed for hotkeys to work (so you can use hotkeys on a controller), I usually use “select.” What this means is, if it’s set to select, and you set fast forward to the right trigger you will need to press select and right trigger in order to fast forward
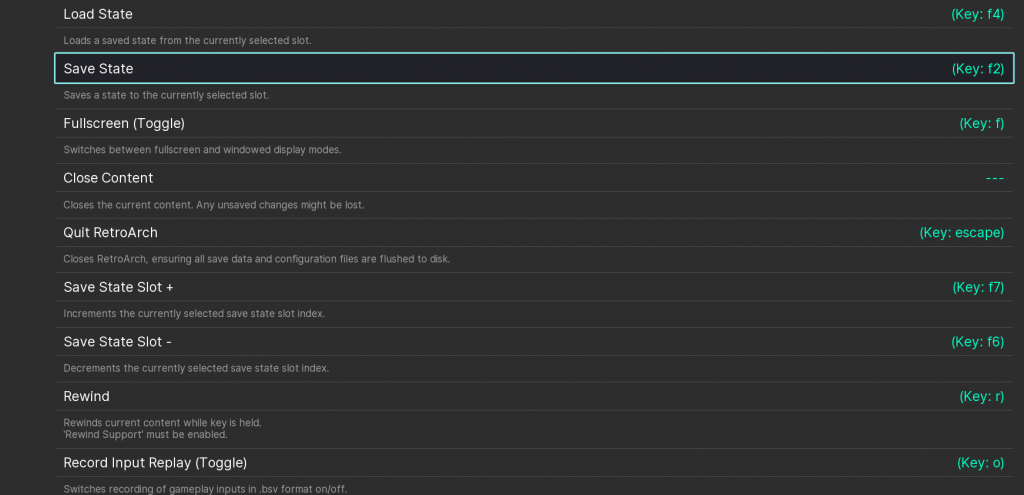
Fast-Forward – There are two types of fast forward, hold and toggle. Should be pretty self explanatory, hold will fast forward as long as the button is held down, but toggle will fast forward until the button is hit a 2nd time.
Rewind – I use the left shoulder button
Make a note of what Menu (Toggle) is set to in case the controller becomes disconnected at some point and we need to get back to the menu, the default is F1.
Settings > Input > Menu Controls
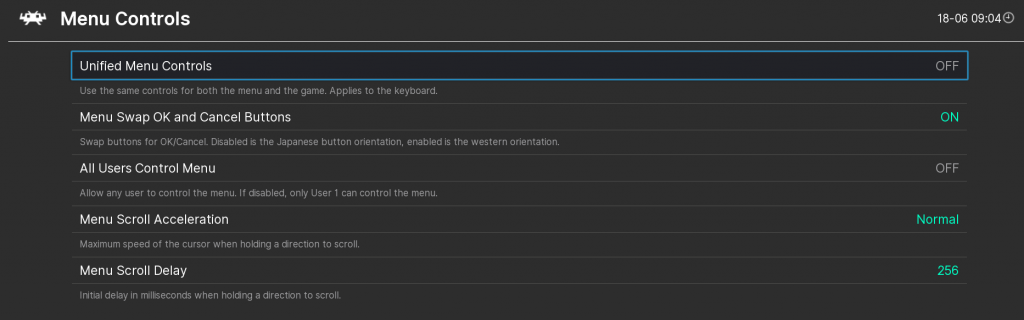
Here we want to set All Users Control Menu, this is so player 2 can adjust things on the menu too. Other options are usually fine as is and self explanatory.
Video Settings
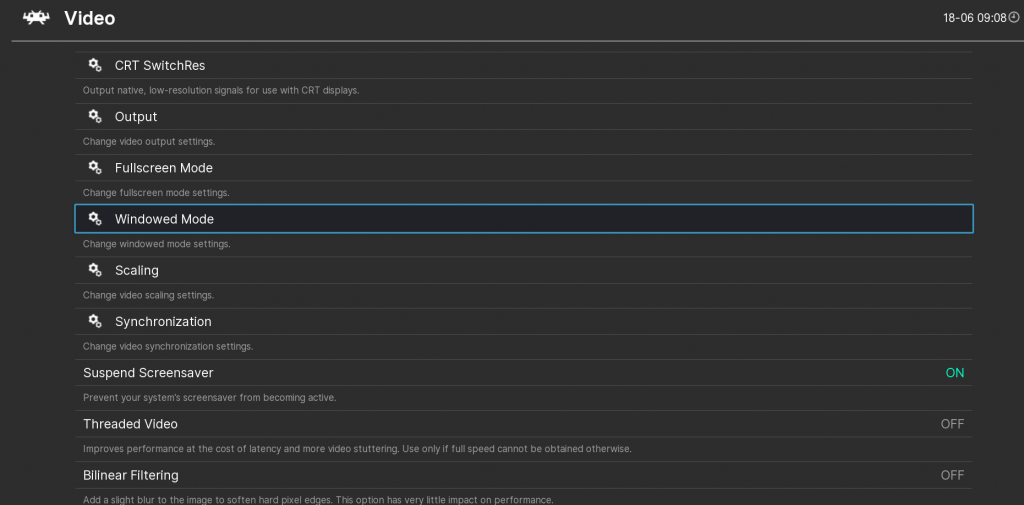
Settings > Video
The majority of the most important performance related settings will be here, they’re also some of the hardest to understand. If you have performance problems you will spend most of your time here.
CRT SwitchRes – This tells RetroArch to take the exact video timing from a core and use that to output with native resolution 15KHz modelines for a standard or arcade CRT. This is how actual retro consoles worked and, on a real CRT from the 90s will look like a real console.
On a modern display this will display broken garbage, it is only useful if you have an old CRT.
Threaded Video – Runs the video driver on its own thread to avoid video driver overhead. This is useful if your video driver has terrible performance and you cannot get better performance otherwise but will make frame synchronization impossible and increases latency (which will both be discussed shortly.) It should not be enabled unless absolutely necessary, which it wont likely be.
Bilinear Filtering – As described, slight anti-aliasing. Very little impact but inconsequential on remotely modern hardware. Personal preference, but I set to on
Video Filter – Personal preference, but if you want filters, these filters run on the CPU which is not as efficient as running shaders on the GPU. Except in particular hardware configurations with a fast CPU but terrible GPU, ignore.
Video > Output
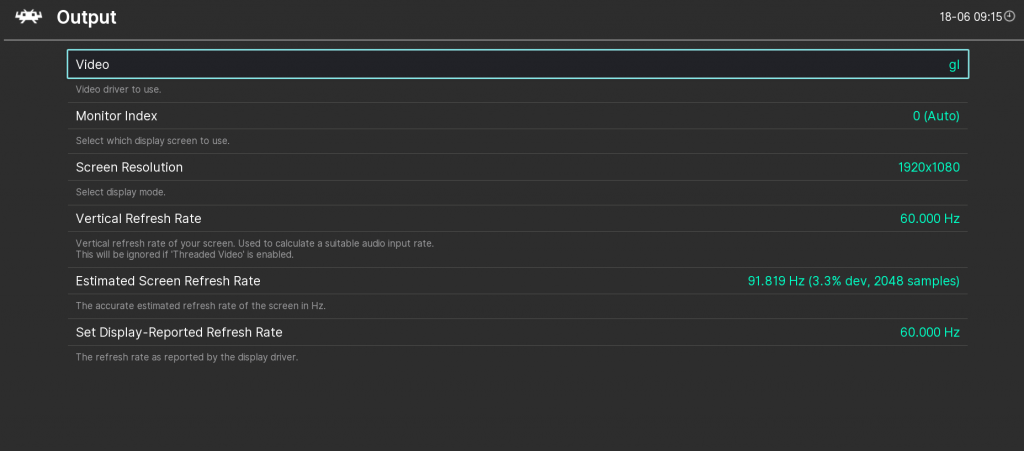
Many of the settings here involve properly configuring vsync and other video settings related to synchronization. The goal here (and with most video settings) is to maintain performance but also avoid choppiness. It’s very easy to incorrectly set something and, even running at full speed, have choppy animations. Settings we will adjust next in the Synchronization menu are also important for maintaining smooth gameplay.
Video – This is the video API you will use, not all cores support all drivers but the majority do. OpenGL and Vulkan support are by far the best supported in RetroArch, and while RetroArch does have support for DirectX there are very few situations where you would actually want to use it. The following 3 are the ones that actually matter here
gl – The OpenGL 2.0+ driver (will actually run OpenGL Compatibility on modern GPUs), default because high compatibility, but not best for performance
glcore – The OpenGL 3.1+ driver, still high compatibility, generally a much better option than gl
Vulkan – Not all emulators have Vulkan support and will force glcore. Much better option on AMD gpus than gl due to AMDs poor track record of updating GL. Still generally a better setting on nvidia GPUs. Allows free “Hard GPU Sync” lowering latency.
Vertical Refresh Rate – RetroArch will sample the display to try and figure out the refresh rate on its own, vsync must be enabled while this is running. This should be very close to the Display Reported Refresh Rate. You can manually set the Vertical Refresh Rate or let Estimated Screen Refresh Rate run long enough to stabilize, then select that option in the menu to set Vertical Refresh Rate to it.
This is very important for avoiding stuttery gameplay, especially with Variable Refresh Rate screens (G-Sync, Freesync, etc.) You definitely want to do this if you do not want choppy Mario.
Monitor index – This has nothing to do with performance, if you have multiple monitors hooked up you can choose which monitor RetroArch displays on while in fullscreen mode. Actually useful especially if you got a long HDMI cable and a TV you wanna play on.
Video > Scaling
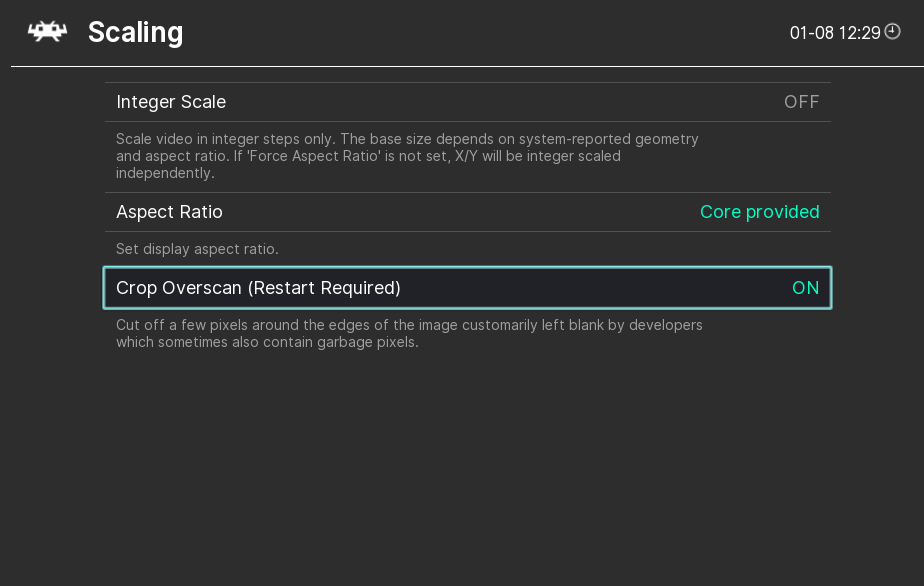
There are few important options here, unless you want to force widescreen by stretching the image.
Aspect Ratio – Useful for forcing widescreen globally if that’s how you like to play, usually best set to Core Provided
Crop Overscan – If you’ve ever played Mario 3 in an emulator and seen junk off to the side, this is why. Leave “On” unless you really wanna see the junk off to the side of the screen. More just an interesting thing because of how old games were designed.
Video > Synchronization

A lot of these settings might be worth messing around with if things just “don’t seem right.” If even easy to emulate games feel choppy compared to real hardware. The most common cause of this on modern hardware is the emulator core and the display’s refresh rate not matching up perfectly. Because of this, many of these recommended settings may not be completely ideal on any other machine.
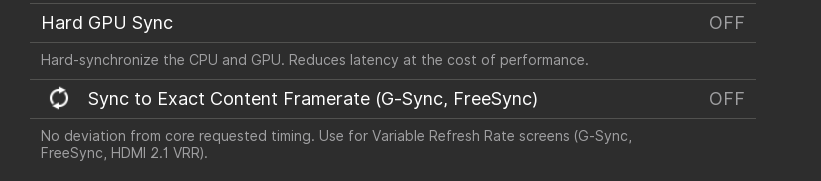
On displays with Variable Refresh Rate (Freesync, etc) this is usually pretty easy to work with because of one recent setting (Sync to Exact Content Framerate.)
Many of these settings also affect latency, within the past few years RetroArch has gotten to a point where it is possible to reliably match or even sometimes beat latency on original hardware. Many of the settings though have downsides and are not usually worth it unless you really need incredibly low latency gaming (Kaizo Mario guys and stuff.)
Sync to Exact Content Framerate – On
If this is set to “on” Retroarch will double, triple, whatever is necessary the actual framerate to match the core’s timing with the screen’s timing as reported by VRR.
VSync – On
Even with VRR this should still be set on. The only time dropping VSync is a real solution is with ancient/low power hardware, a bad GPU, an OS with bad OpenGL support (not Windows or Linux) or serious driver bugs (this is possibly going to be an issue with Intel’s new GPUs.)
Black Frame Insertion – Probably keep at 0 unless you notice blur
CRTs would draw a black screen in between each frame, this reduced motion blur (which is very obvious on older LCDs.) Sometimes on very high refresh rate screens you can still see motion blur when running low refresh rate content at a higher refresh rate. For example, no matter what you do N64 will always run at less than 60fps. In Mario 3, Mario will never have 120fps of movement. RetroArch can insert an empty, black frame (or multiple black frames) in between every frame to reduce this.
Sometimes this is very effective, but often on good displays it’s either no difference or better done by the actual display itself if it has the feature. If you notice blurry animation, it might be able to be helped by this setting, otherwise leave as is and let the actual high refresh rate do its job.
Adaptive VSync – Not necessary except on weak hardware.
Frame Delay – Not worth manually adjusting because the ideal number will be different depending on the core and refresh rate.
Automatic Frame Delay – Before a frame gets to the display, the core itself has to actually generate the frame. This is true for all graphical computing, not just emulation. Once the frame is generated user input cannot affect it since it already exists, any input in between an old frame and a generated new frame is latency which on a 60hz display generally comes out to around 17ms. Frame Delay will force the core to generate the frame at a later point, meaning there is less of a gap between user input and the frame being generated and so lower latency. If the frame is generated too late it will cause sound crackling and performance issues, the gpu does not have enough time to generate the frame before it’s expected to be displayed. This isn’t too much of a problem though with retro emulation on newer hardware.
Automatic Frame Delay will aim for generating the frame at half the time the refresh rate allows for, meaning the normal 17ms will be cut in half, if it detects frame hiccups it will reduce it until the framerate becomes stable. This helps with only a minor source of latency but it also costs very little now. Usually this is best turned on, but after all other things are setup and it can be guaranteed that things otherwise run smoothly.
Hard GPU Sync – Set to On if using the Vulkan driver, it’s a free reduction in latency.
Hard GPU Sync Frames – You want this at either 0 or 1 if 0 does end up causing issues (performance problems, unlikely if using Vulkan)
VSync Swap Interval – This should be set to the closest number to your screens refresh rate divided by 60
Video > Fullscreen Mode
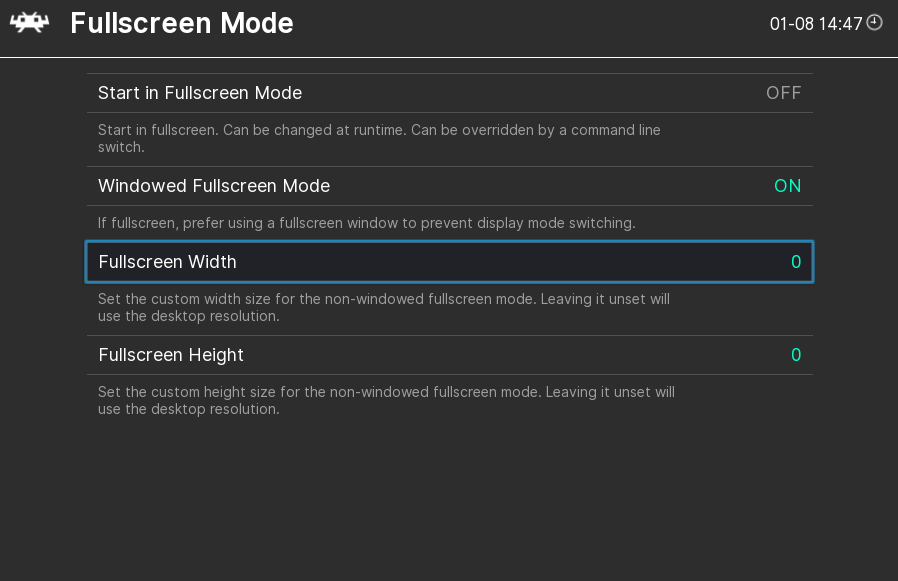
Most of these are pretty self-explanatory, on a modern Windows machine you will want Windowed Fullscreen Mode set to “On.” Windows under most display drivers will run it in Windowed mode no matter what you have it set to anyway.
Audio
Settings > Audio
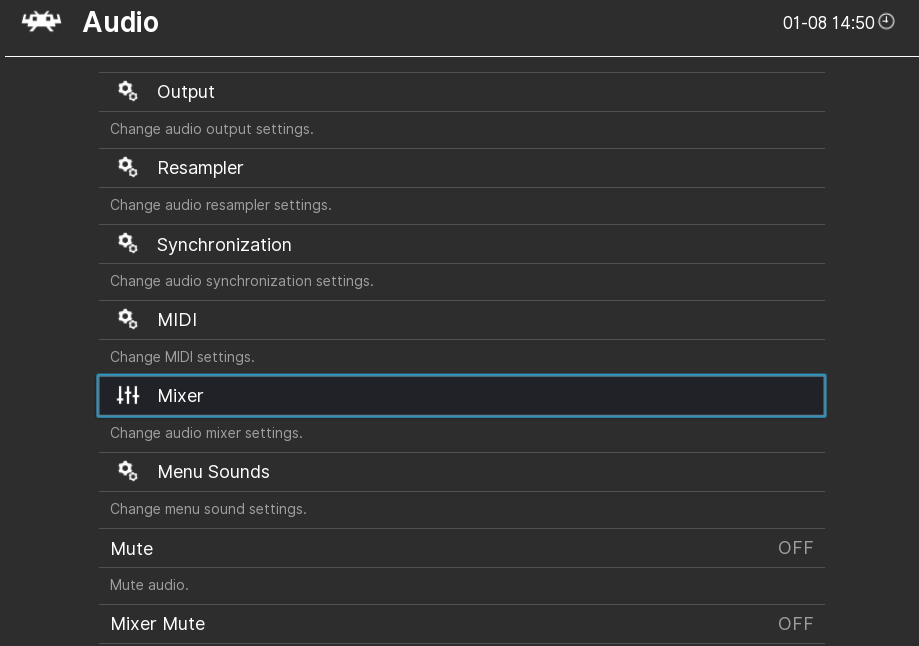
There’s nothing to change here usually. The Audio driver is not likely to matter on Windows, Audio Latency can matter if you have audio crackling (not common on modern hardware that can emulate at fullspeed) or to get small improvements in latency not likely to matter for most people.
You can force an audio device here which can be useful if you have different sound cards that do different things but this doesn’t work with many Windows audio drivers and it’s usually better to have Windows do it itself instead of RetroArch
Latency
Settings > Latency

The settings here are mostly the settings from other sections that also affect latency. It doesn’t matter whether they’re set here or in the other sections.
The exception is “Run-Ahead to Reduce Latency.” Run ahead is a technique designed to deal with latency inherent in the actual games themselves, is by far the most extreme way to reduce latency and is necessary to achieve latency below playing most games on their consoles natively.
The configuration for run-ahead needs to be game specific, what works on one game may break another even on the same console. A very simplified explanation of how run-ahead works is, the emulator will run the game twice. One copy of the game runs ahead of the other by a certain number of frames. There are a couple ways to do this and which one is best depends on the emulator core.
The main idea for both is that a state is saved after every frame, when the emulator receives an input it will load the early state to roll back to the 2nd, earlier version of the game to enter the input as if there had been no latency.
For example, if you were really into Kaizo Mario hacks and you played on original hardware there would always be 2 frames of latency between when you press jump and when Mario jumps. This is built into the game’s logic and can’t be changed on original hardware. With run-ahead properly configured we can get to effectively 0 frames of latency even when the game otherwise would refuse it.

This can cause the game’s logic to break though, the frames can disagree with each-other in other ways and weird things can happen. The more frames you’re running ahead the more likely the two are to differ and cause the game to be unplayable. Run-ahead is an incredibly cool feature that you should probably never need to use. Especially if the game relies on randomly generated numbers for anything there is no guarantee they will remain the same between instances with run-ahead.
AI Service
Settings > AI Service
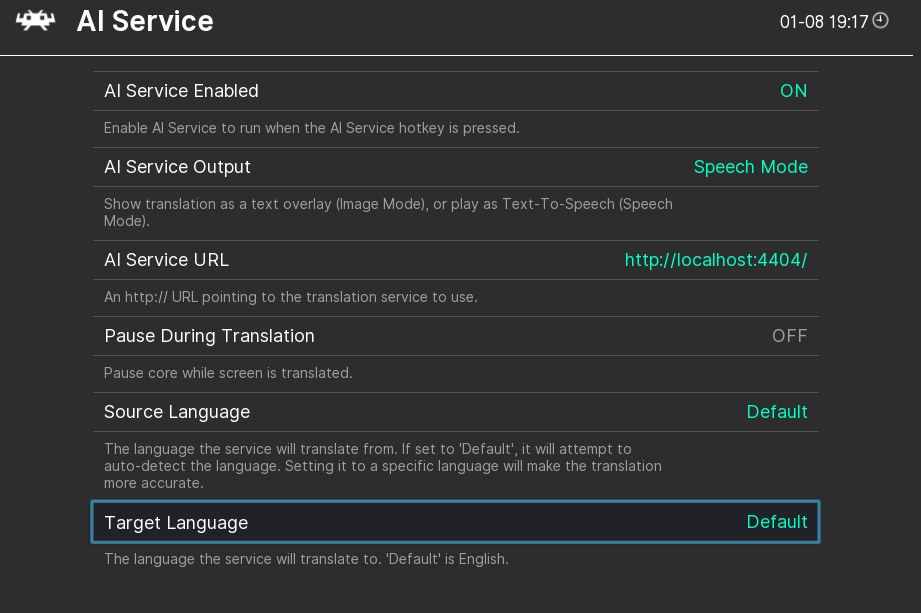
I’m not gonna write a guide to this now because it gets complicated and is only useful if you want to play Japanese games that have not been translated yet, but it’s a really cool feature. AI Service can overlay machine translations of text detected in games, or generate a text-to-speech translation.
I’ll write something about it later
Achievements
Settings > Achievements
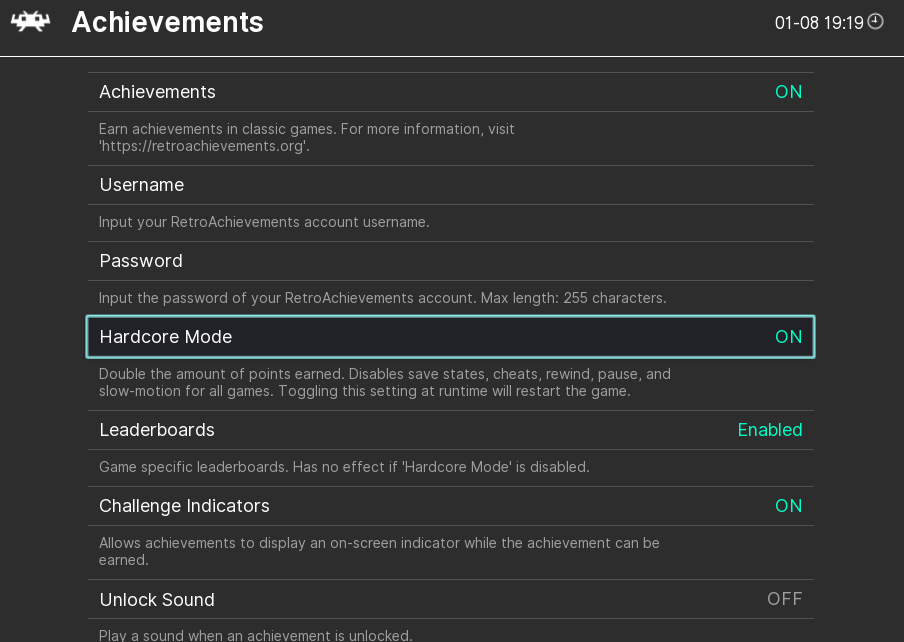
Retroachievements.org has added a whole bunch of user made achievements to retro games that can be tracked with an account on their website. Setup is pretty self-explanatory, but requires registering on their website. The password itself is NOT saved in RetroArch, only the login token.
Frame Throttle
Settings > Frame Throttle
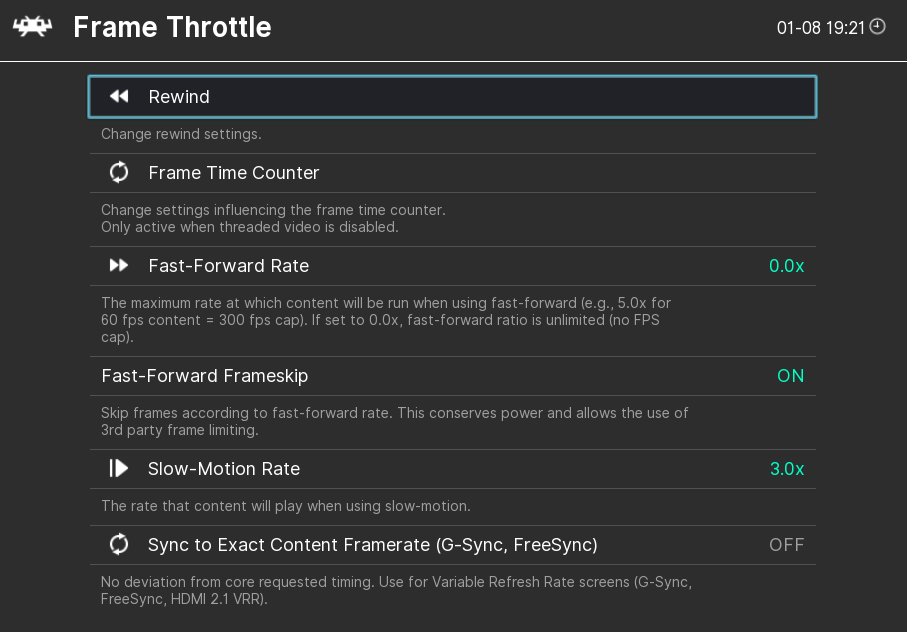
The most important settings here are enabling Rewind and setting the Fast-Forward Rate.
Frame Throttle > Rewind
Rewind Support – On
Setting this to on enables the Rewind feature, obviously. Rewind works by keeping a buffer of automatic savestates (an “oops” file.) This does have a performance impact because this means constant writing to the drive.
Every emulator handles savestates differently, they are not standardized. For most consoles savestates will be very small and the performance impact will be negligible enough to not matter. The biggest exception to this is N64 savestates. All current N64 emulator cores are variants of mupen64plus which handle savestates in roughly the same way, they are very large compared to nearly every other core. Having Rewind enabled for N64 is one of the most common causes of poor framerates in N64 games, so it’s usually not a good idea to have it enabled for any N64 core.
(as a side note, battery saves are different from savestates and are standardized. The emulator has to handle savestates in its own way since they are not a part of how the original consoles worked. Battery saves are handled by the game itself, they are kept separately from the rom since roms are, like the name implies, read only. Emulators just dump that data into a file, that’s all a battery save is. Because of this an SNES battery save, an SRM file, will be the same whether Snes9x made it or bsnes made it.)
We can enable it here if we want mostly-global rewind and create an override for N64 with Rewind disabled later to account for this
Rewind Frames – This sets how granular each “rewind” is. The default of “1” is usually too slow, it will rewind at the same speed the game normally runs forward. I think 5-10 frames is good for most games. Too high and you’ll overshoot the point you’re trying to rewind to.
Rewind Buffer Size (MB) – This affects how far back you’ll be able to rewind. Each savestate rewind makes takes up filespace, eventually the buffer will fill and the oldest will get deleted. 20MB is a very safe, small number but you’ll probably want to increase this to whatever you feel comfortable dedicating for this feature. For reference, a SNES savestate is usually about 400-600KB. To adjust this in different increments you need to adjust the next option “Rewind Buffer Size Step.”
Fast-Forward Rate – 0.0x is usually way too fast, it will just run as fast as your computer is capable of running it when fast-forward is enabled. It’s personal preference what this should be set to, but 3.0x is comfortable for many games. Sometimes 0.0x is useful if you’re grinding in RPGs I guess, but you should just grind at normal speed like a man.
Network
Settings > Network
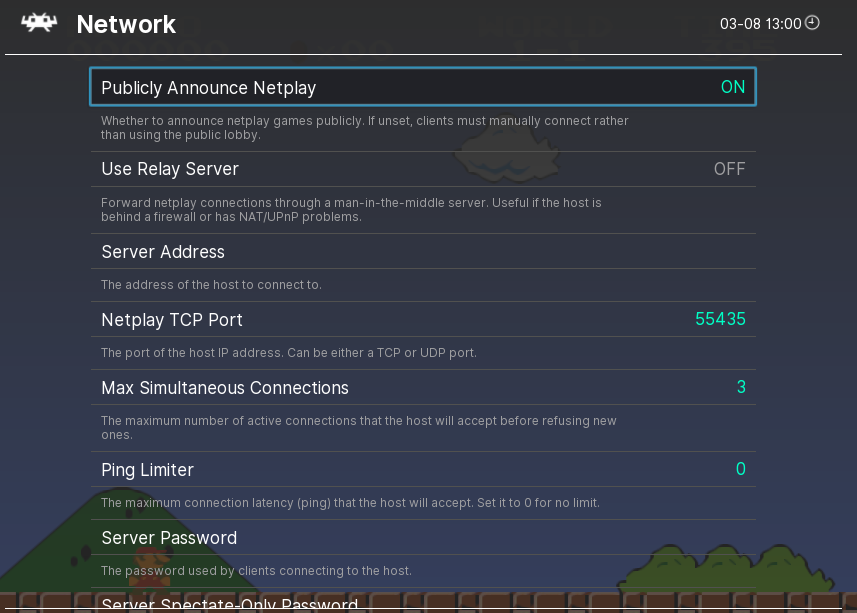
Netplay is complicated, depends on what cores you are using and what the other player is using. It requires its own guide. RetroArch’s current netcode does use rollback though.
Directory
Settings > Directory

Here we set where RetroArch looks for different kinds of files. There are only two that are likely to matter
System/BIOS – Make sure this is set to C:\Retroarch\system (or wherever that folder is wherever you installed RetroArch)
This needs to match the folder we extracted BIOSes to earlier
File Browser – Set this to the folder containing the folders that your roms are in. This isn’t necessary, but will make scanning for roms later much easier.
Thumbnails can be set to another directory if you want to download Box Art or other media for all your games but keep it on another drive, like if you had RetroArch on a small, fast SSD you didn’t want to fill up, but had a bigger, slow HDD you could put it all on. The same is true for Recordings and possibly Cache in exotic configurations (computers which use a ramdrive for cache. This is actually a very cool thing to do if you have a lot of ram and a lot of time, but is way outside the scope of RetroArch configuration.)
If you want to download thumbnails for your game you can use the thumbnail downloader in Retroarch. This is pretty slow and sometimes inaccurate if you have a lot of games, especially full sets.
You can manually download them all from https://thumbnails.libretro.com/packs/ though much faster. Download the archives for the systems you want, extract them, and move the the directories for the console over to the thumbnails directory or whichever directory you set thumbnails for.
Saving Configuration Again
Now that everything is configured it is important to make sure the configuration is saved, it is NOT automatically written whenever a change is made, only when forced or (if we configured it to like the guide said to earlier) on exit.
Main Menu > Configuration File > Save Current Configuration
The main configuration file, the one we wrote here, is loaded first. There are other types of configuration files we’ll use later; core overrides, directory overrides, and game overrides. They are loaded in that order, so this means the main configuration will never overwrite anything, but the other configurations will overwrite it and every override before it in the configuration hierarchy.
Outside of this hierarchy there are “core options” (retroarch-core-options.cfg and .opt files) which include settings specific to a core that don’t need to exist in the main RetroArch configuration. Non-arcade emulators don’t need an option for what to do with a coin-insert, 2d systems don’t need 3d rendering options, etc.
Part 4: Adding Cores and Creating Playlists
At this point RetroArch is hopefully configured properly to at least play games at full speed, but it has no emulator cores and it’s pointing to no games. We’re going to install the cores first and then scan our rom folders, creating playlists for each console. Then, we should be able to easily choose a game with a controller-oriented UI and jump quickly into it with a specific emulator. First, we need the emulator cores.
The emulator cores are maintained and stored on libretro servers, all of this can be done manually if the servers go down (has happened recently after dweeby hackers emptied the github), twinaphex runs out of money and no one can pay for hosting, we all die, or if you want to build the cores yourself to either implement custom changes, optimize performance to an insane degree, diagnose problems, have too much time etc. But, the easy way is to just trust that the servers are up and download everything through RetroArch’s built in updater and core downloader.
Adding Cores
Main Menu > Online Updater
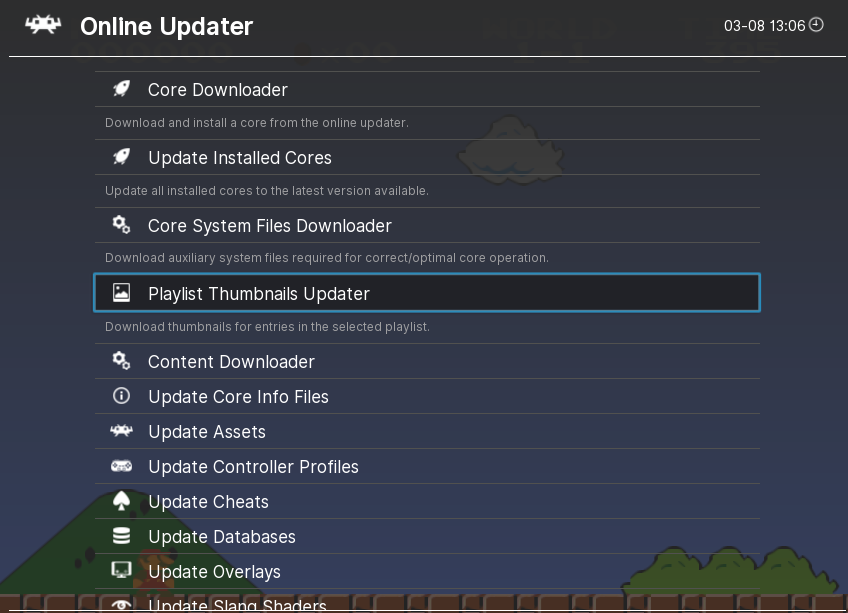
While you’re here first run the basic updates;
Update Assets, Update Controller Profiles, Update Cheats, Update Databases, Update GLSL Shaders
Overlays are unnecessary for most people playing on a normal screen unless you really like the Super Gameboy art surrounding your game aesthetic. When that’s all done we’ll move onto the actual emulator cores.
Online Updater > Core Downloader
Wait for it to fetch the corelist, and download at least one core for every system you want to emulate. I recommend cores that are easiest to work with and most compatible, not necessarily “best.” The conventional wisdom is “there is no best core for a console” and, even though this sounds like a platitude, is actually true.
Cores, on Windows, are just dll files. They are not portable, these dll files are Windows specific executables and will not run on another operating system. Cores for Linux are built from the same source tree but end up being a different binary, and that’s true with every other OS. This wont matter to you if you use RetroArch’s built-in core downloader, it will always match your system, but will if you try to do it manually.
Arcade – Some version on FinalBurn might work, depending on your game. Honestly though, you are better off using standalone MAME if you want to emulate arcade games. MAME does not play nice as a libretro core and the MAME guys suck.
Atari (most Atari systems) – Stella
PC Engine – Beetle PCE FAST
Nintendo 3DS – You’re better off using standalone Citra, but the libretro cores are getting there
Nintendo DS – DeSmuME
Gameboy – Gambatte (TGB Dual has some use for netplay)
Gameboy Advance – mGBA
Gamecube/Wii – You can use the Dolphin core, but because Dolphin really has its own, very specific settings Dolphin standalone is still the best choice.
NES – Nestopia UE is reliable, I generally use it. But all the NES emulators are very mature, some people really like FCEUmm, Mesen is the newcomer with some wild features to play with.
Nintendo 64 – install BOTH Mupen64Plus-Next and ParaLLEl. You will usually want to use Mupen64Plus-Next, and will likely get the best performance out of it. ParaLLEl aims for more resource intensive, lower-level emulation. They are actually both the same emulator (Mupen64Plus) but with different baked in plugins. At this point Mupen64Plus-Next can be configured to use the same Low Level RDP plugin as ParaLLEl, but ParaLLEl can be configured to use a wider variety of plugins (mostly useful for compatibility.) N64 emulation, because of bad decisions made in the late 90s, is just built this way and it’s too late to go back.
SNES – A can of worms. Snes9x – Current is the standard, up to date version of Snes9x that works for everything, runs easily, has all the features Snes9X has gotten over the years. But then there’s bsnes, byuu/near’s emulator that aims for accuracy above all else, at the expense of performance. It has its own set of features that Snes9x doesn’t have (the coolest being high-res mode7, when it works) and a complicated/hostile history with RetroArch.
I use Snes9x, it’s accurate enough for actually playing games, it has the highest compatibility with romhacks which sometimes wont work on an emulator that’s too accurate, and it runs very well.
The other variants of Snes9x are specifically built for lower power machines like a Raspberry Pi or a weak phone. They don’t matter here.
Sega basically everything 2d – Genesis Plus GX
Sony Playstation – SwanStation generally performs better, but Beetle PSX HW plays some games better. Both are probably about equal. PCSX ReARMed is mostly for very low end hardware.
You should randomly go back into the Online Updater sometimes and select “Update Installed Cores” which will do exactly what it says and update every core that you have installed. Some cores move fast, especially the N64 emulators.
Creating Playlists
Since the RetroArch UI is mostly meant to be used with a controller, browsing through directories every time you want to play a game wouldn’t work very well. RetroArch can be used this way but it’s really not the best or intended way to do things. Instead, RetroArch has a built in scanner that will scan the files in a directory, compare each file’s checksum to a list of all known games in RetroArch’s databases stored in rdb files, and write a pointer to it in a playlist file. The databases are based around the popular fullsets for each console and should be compatible with nearly every commercial release of a game on a known system, they’re updated regularly
The playlists have the file extension “lpl” but are really just simple text files. An entry in an lpl playlist looks like this;
“path”: “G:\Roms\Nintendo – Nintendo Entertainment System\Super Mario Bros. 3 (USA).zip#Super Mario Bros. 3 (USA).nes”,
“entry_slot”: 359057152,
“label”: “Super Mario Bros. 3 (USA)”,
“core_path”: “DETECT”,
“core_name”: “DETECT”,
“crc32”: “85A79D9C|crc”,
“db_name”: “Nintendo – Nintendo Entertainment System.lpl”
If you needed to, you could manually add a game to a playlist by recreating this structure. This isn’t necessary very often anymore because RetroArch has the ability to create playlists from files that don’t match anything in the database but it used to be a thing people had to do.
This rom here exists inside a zip file, and so the playlist contains an extra bit for the path that specifies which file in the zip file to actually use. When the game is played it will be temporarily extracted, put in cache, and then deleted afterwards. Not every core supports this, but most do.
crc32 is the checksum used to identify the rom
core_name is not set for this rom yet (or for the playlist) but, after a cores been selected for it, that core will be written to the playlist and will become the default for it from then on.
Your roms should be arranged like this.
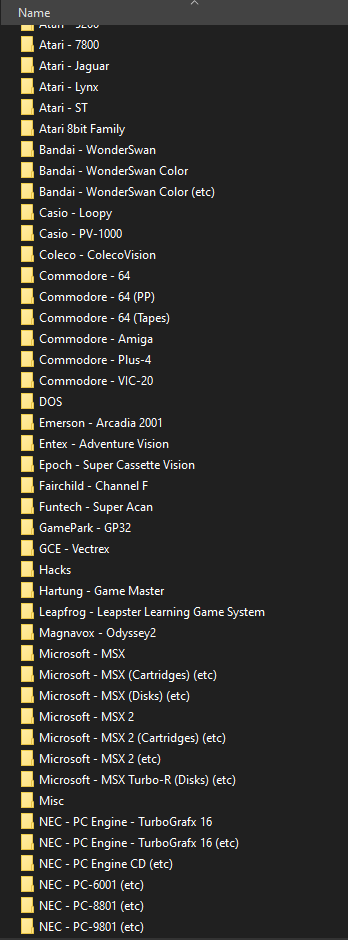
One main folder containing a subfolder for each console. Any roms that will not have a matching database entry (prototypes, hacks, translations) should be put in another folder for that console separate from the console’s main folder. I choose the naming scheme “console (etc)” for these roms. This is because we don’t want the scanner picking up already scanned roms when making playlists for the translations, hacks, etc.
Scan a console by going to Import Content > Scan a Directory and navigating to the console’s directory. This is NOT for the “etc” folders, but only for the directory full of roms that will have a matching database entry. Once you find the directory select “Scan This Directory”

You should see the progress indicator on the bottom left of the screen. The scanner is not very fast, there are other ways to do it, but this way is accurate and compatible with all kinds of hardware. You can scan another console while one is currently being scanned but if you end up scanning more than 3 consoles at a time things will slow down by a lot. Once it’s done the indicator will go away and you should have a new menu option for that console.
The entry for the system will be back in the root menu on the left. Now, to finish, play a game on each scanned system. You will get an option window like this, select “Run”
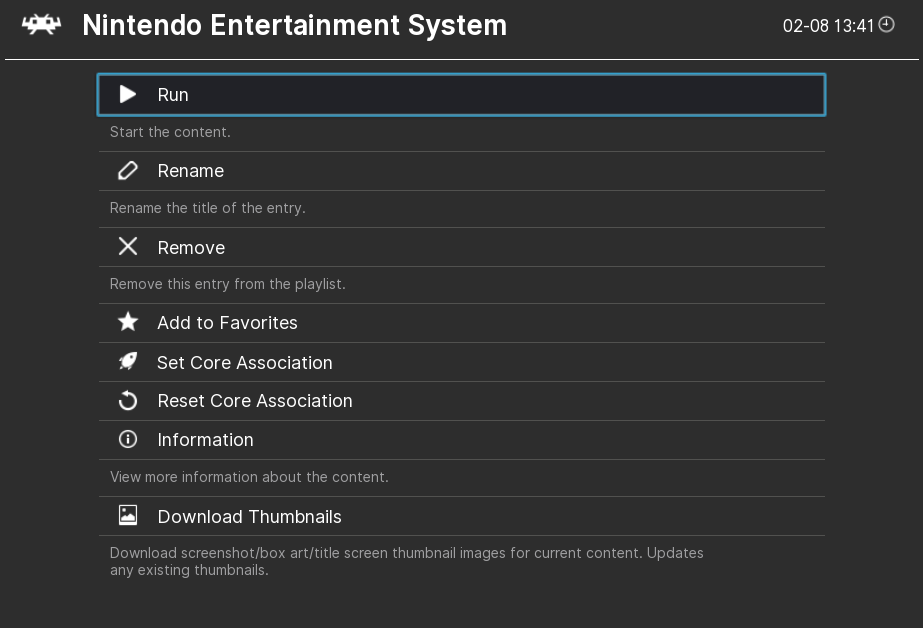
Now you’ll be asked to select a core. Choose the core you want to use and run it. If everything went well the game should start. Press the menu hotkey you assigned (or the default F1 on your keyboard) to bring up the options menu for this core.
To streamline selecting a game though, we’re going to want to associate a specific core with each playlist, otherwise we’ll be asked which core to use every time we go to play a game. We want to do this for every console where we’re sure we only want to use one core (so don’t do this with N64, we wanna manage the cores for that on a game by game basis) To do this go to;
Settings > Playlists > Manage Playlists
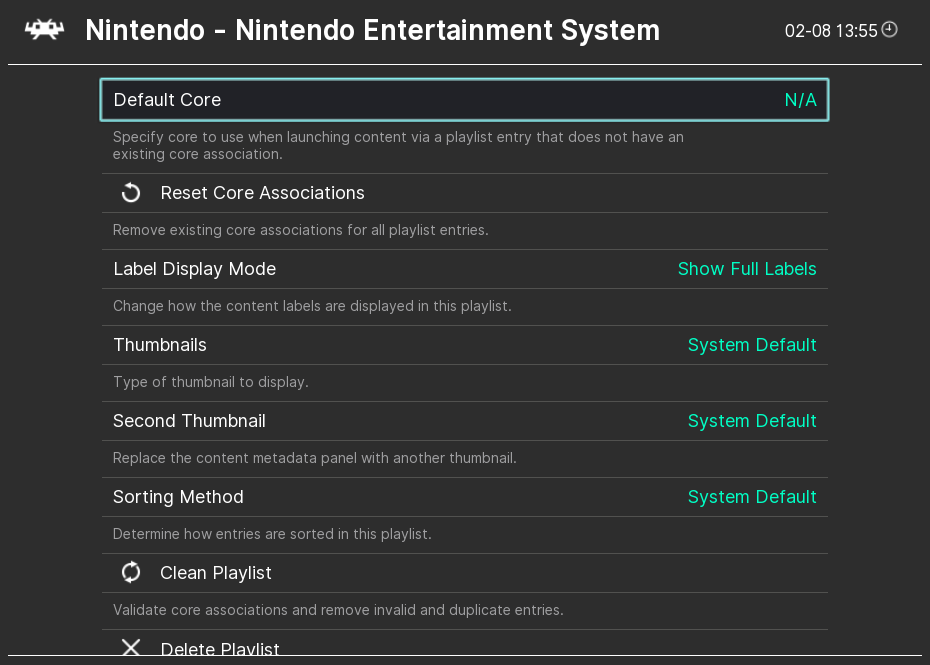
Select the playlist you want to assign a core to. There are a few options in this window but the important ones for us now are “Default Core” and “Reset Core Associations” (if we want to undo something we did)
Select “Default Core” and choose the core that matches this system
This sets a bit at the top of the lpl file for that playlist, for example what was
“default_core_path”: “”,
“default_core_name”: “”,
Becomes
“default_core_path”: “C:\Retroarch\cores\nestopia_libretro.dll”,
“default_core_name”: “Nintendo – NES / Famicom (Nestopia UE)”,
Now if we select a game and then press “run” it will jump right into the game.
For consoles with no default core, the core we select to run a game with will be set as the default core for that game only. So if we run Mario 64 with Mupen64Plus-Next, the next time we run Mario 64 it will use that core. If that core doesn’t end up working we can change the core by selection “Set Core Association” or “Reset Core Association” and then running it again.
“Set Core Association” will also work for a game in a playlist with a default core, in case there we want to, for example, run every SNES game with Snes9x-Current except Mario Kart because we want that high-res mode7 in bsnes.
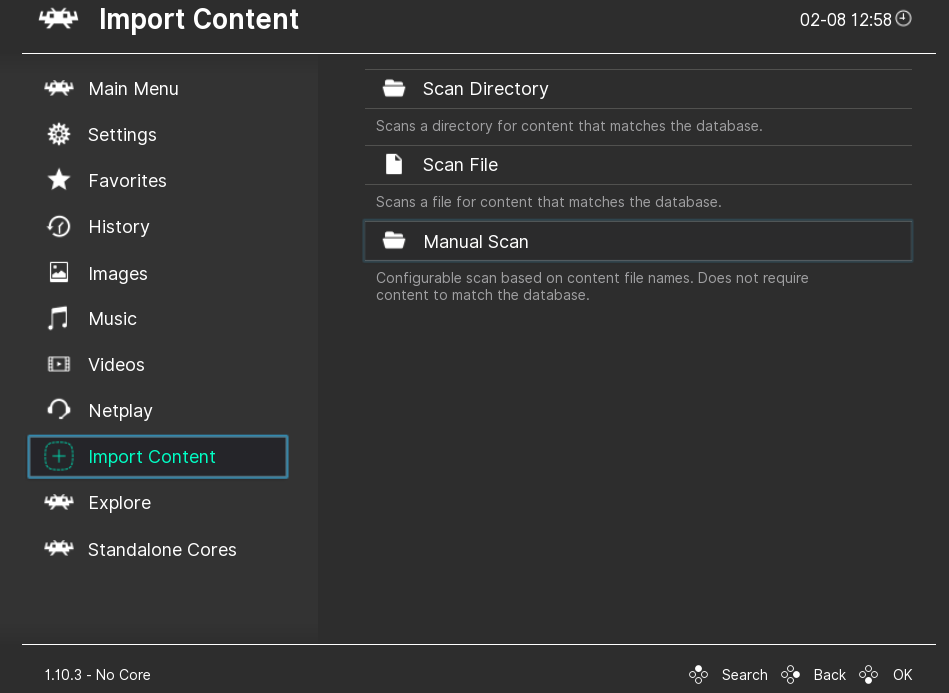
Manual Scan
Import Content > Manual Scan
For folders with files that do not match a database we need to do a manual scan
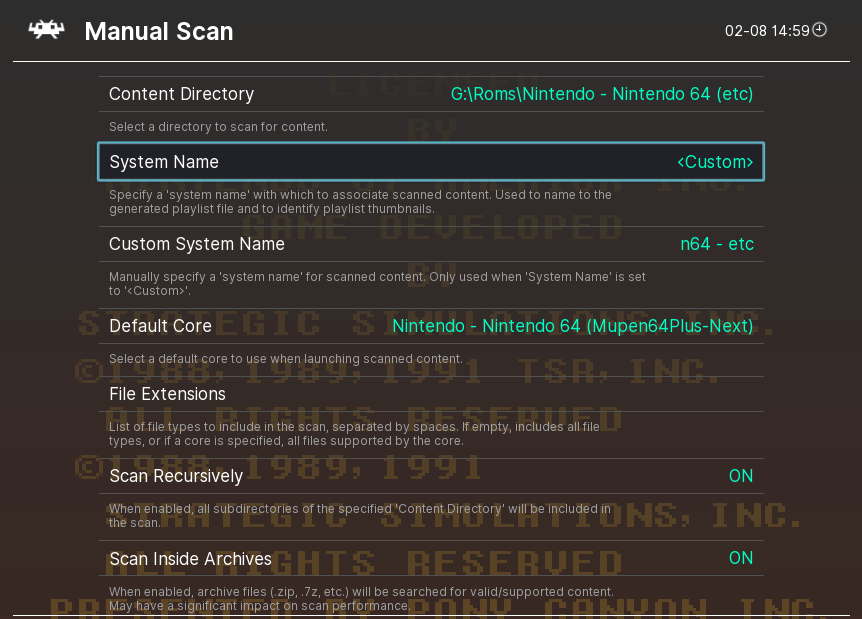
Point “Content Directory” to the folder with the roms we want to scan
If we set System Name, the scanner will merge these roms in with the other playlists we have for this console. I don’t usually do this, I think it’s best to keep database roms and non-database roms separated. To do that, set System Name to “Custom”
Custom System Name can be anything, whatever we want it to be called. It will not affect which cores we can use.
If we leave the Default Core blank we’ll have to associate a core with the games later. We’ll also have to explicitly tell RetroArch which files to scan for. It’s much easier to just set a core that matches the type of roms we’re scanning and let it do the rest, even if we want to change core associations later.
Once that’s done scroll to the bottom and select “Start Scan.” That’s it, you should now have another playlist that functions like every other playlist.
Part 5: Core Configuration
This section will not be complete. Every single core has some of its own specific settings and behavior that is handled in the core because there are some things that are very specific to an N64 emulator that are completely irrelevant to an NES emulator. Most emulators will run fine without any extra configuration, though, and the emulator specific configurations are mostly extra things like high res texture packs, CPU overclock or overclocking specific chips that only that system uses (like SuperFX chip overclocking on SNES, which actually makes StarFox play better emulated than on original hardware.)
N64 emulation is an exception and each N64 core has many core specific options that might be necessary to get certain games working. This is one of the reasons it’s usually better to play the Virtual Console version in Dolphin if that exists.
PSX emulation can get a little complicated too.
But for all that, I think it’s better to write separate core specific guides, which I might end up doing but I won’t do now because all in all it would be 10 times longer than this guide just for that. Instead, we’ll cover the few core specific options that apply to all cores and that we’re going to want to do anyway.
Accessing Core Specific Options
Start a game with the core you want to set options for. Press the menu button. You are now at the screen for all game and core specific options. This is also where you save and load states or restart the game without a hotkey.
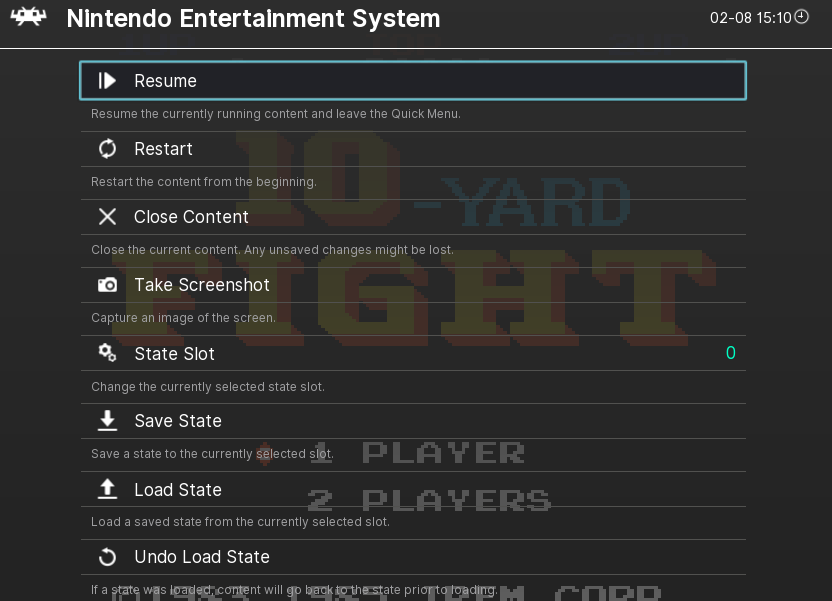
Control Remaps
Core Options Menu > Controls
We originally set up our controller as if it was an SNES controller. This control scheme sucks though for some consoles, especially NES and GB with their 2 button setups. B and A are going to be the bottom two buttons on the controller, with A being to the right and slightly above B on most controllers. Remember though, that RetroArch uses the Nintendo layout, if you’re using an xbox controller your “B” will be RetroArch’s “A.”
With this control scheme, imagine you’re playing Mario. You’ve got B held down to run because you’ve been playing this game for 30 years and you never need to not be running. You gotta jump, so you have to contort your thumb over to the right to hit A every time. This was easier to do on an actual NES controller where the buttons were close and directly horizontal to each other but is awful on a modern controller.
What works really well though is to set Y to be B, and then B to be A. That way the top of your thumb is B, the bottom is A. To do a running jump you just gotta rock your thumb down a little bit. But if we set RetroArch to that control scheme then SNES games will all be weird.
Easy solution though, controller remaps per core. Load up an NES game, back out into the menu and scroll down until you find “Controls.”
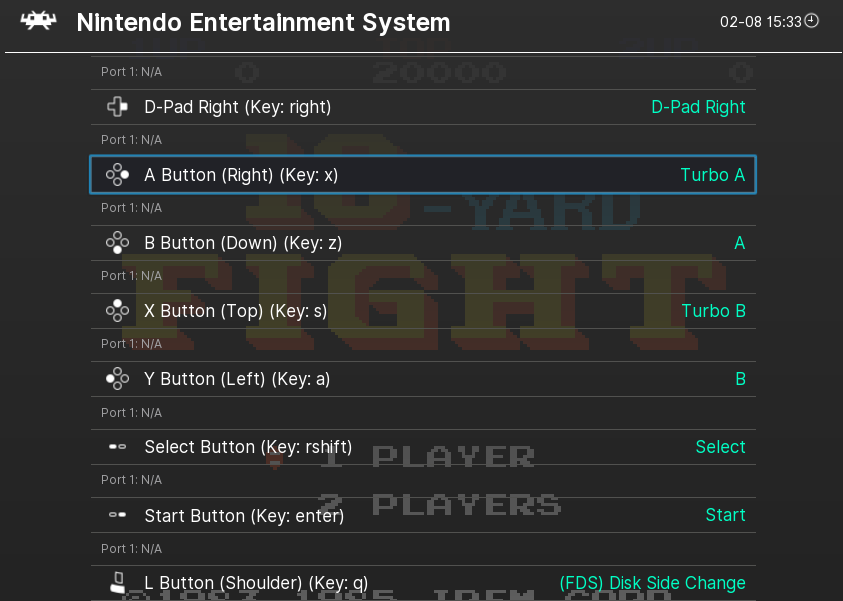
Go down to “Port 1 Controls” to setup player 1 (we’ll have to repeat this for player 2 if we want) and you’ll get a list of every single button on the controller.
We are not assigning buttons to functions here for the most part. We’re assigning buttons to other buttons. So, for the NES controller example, go find “B Button (Down)” and set that to “A.” Do the same thing for Y, and maybe set the other 2 face buttons to turbo buttons for NES or any other changes you want.
Go back one screen when you’re done and select “Manage Remap Files”
If we select “Save Core Remap File” it will make what we just did the default control scheme for every game that uses this core. If we select “Save Game Remap File” then, just this game. “Save Content Directory Remap File” is the less used option and will set it to just this directory, useful if we organize RPGs into one directory or something and set a one handed control scheme for just those games but want to play all other games with a different control scheme or if we’re using an emulator that emulates multiple consoles with different button layouts (common for Sega emulators.)
Do the same for GB, GameGear, Master System, Atari, whatever console you want to configure and that’s done.
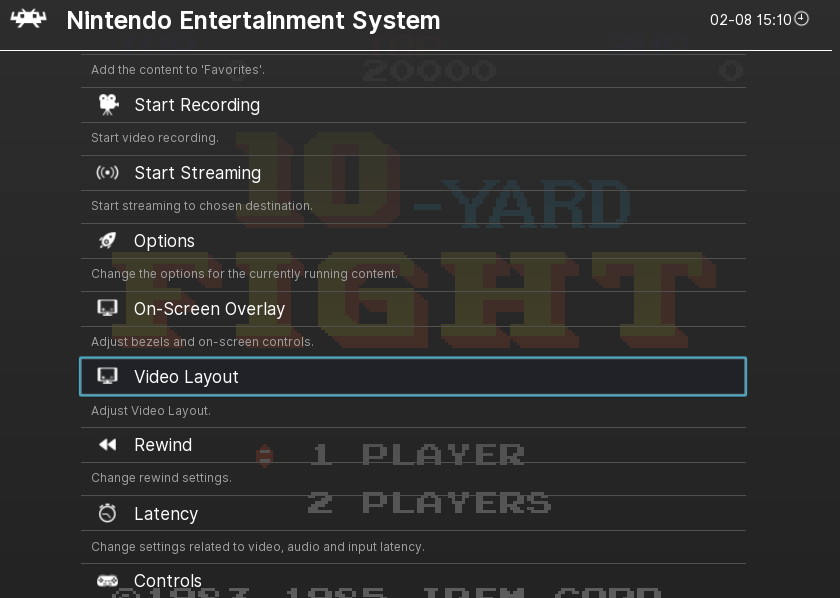
Shaders
Core Options Menu > Shaders
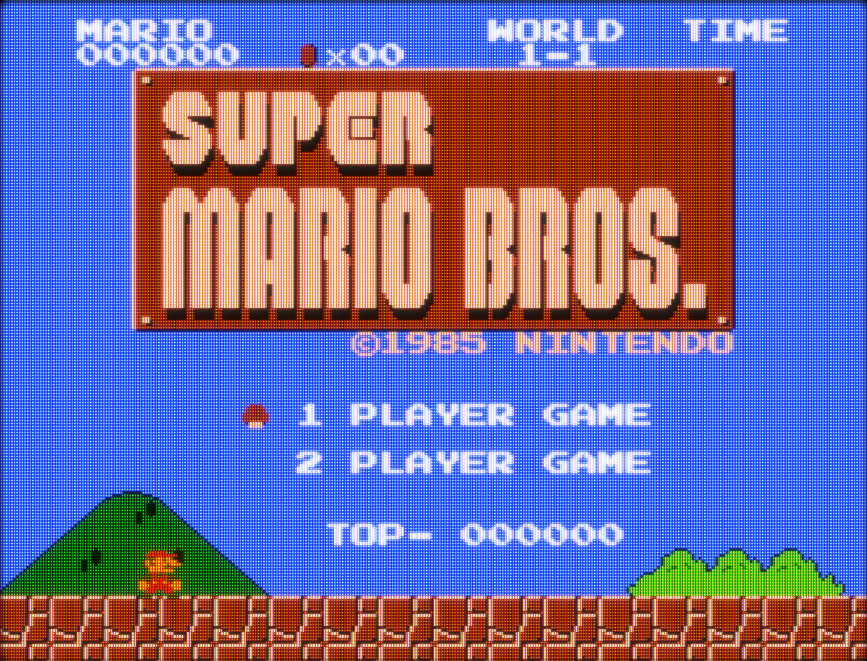
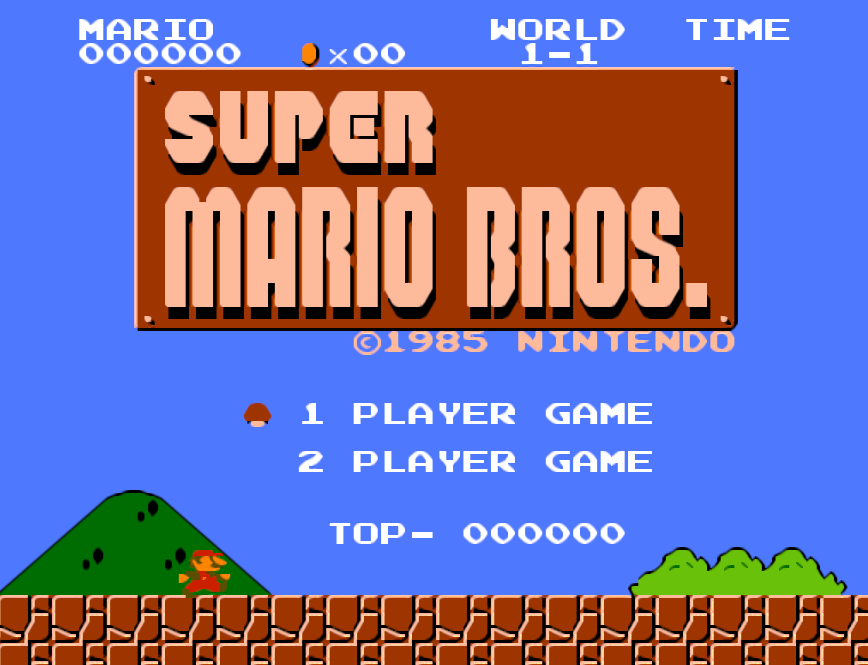
A shader is essentially a list of functions that affect the way the GPU draws something on a screen, in emulation these shaders are applied as a filter over the original image to various effect. It’s very hard to write this explanation without sounding vague and that’s because what shaders do for a game, practically, has grown a lot over the past 20 years.
Long ago, even in early emulators like ZSNES, shaders like Eagle and 2xSaI were around. The shaders would interpolate an upscaled image from the game as a kind of anti-aliasing. So, blocky NES or SNES games would look smooth. But they’d also look very different, and sometimes just a little wrong.
These shaders still exist, and the main idea behind them (making a low-resolution image look smooth or some kind of “better” at a higher resolution) is still probably the most popular reason for using shaders. It’s also the most controversial reason for using them.
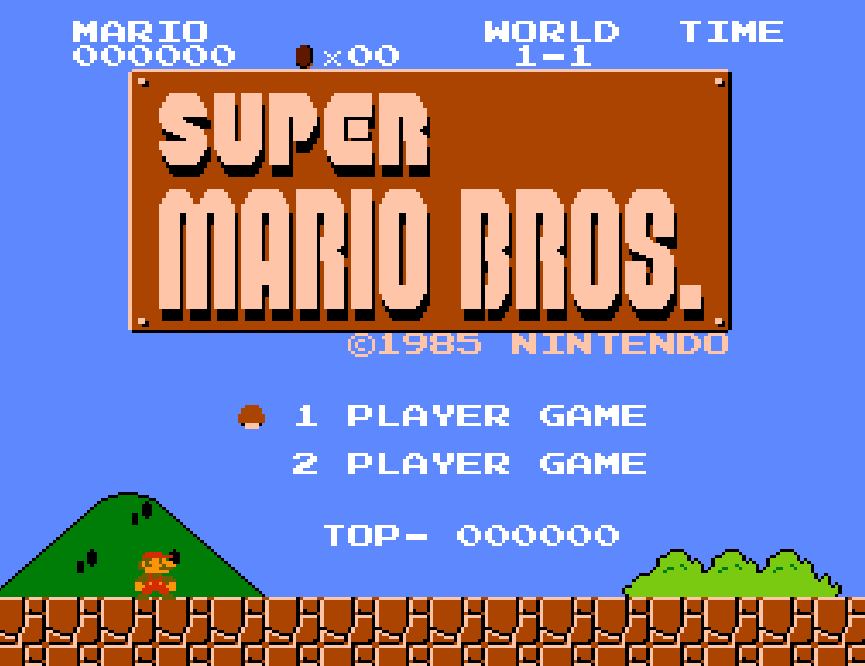
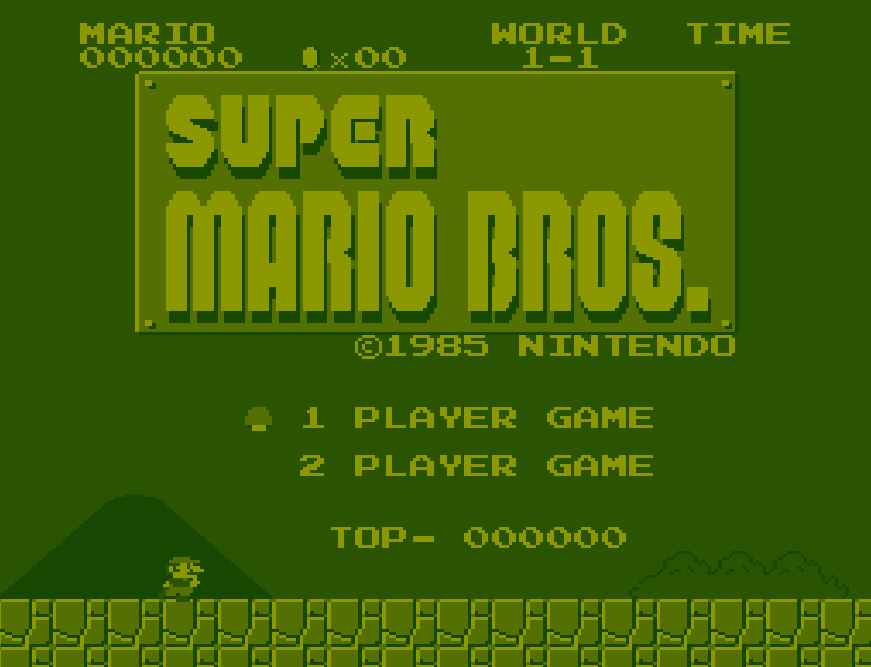
Other shaders attempt to accommodate for the differences in modern screens and whatever screen the original hardware was played on back in the day. Often this means emulating scanlines that you’d get on an old CRT (the black lines in between the actual image lines) or the pixel layout of a CRT. There are also shaders that, for example, cover the screen in that faded green so it looks like an original Gameboy.
Then some shaders do more general effects like mirroring the entire image so you can play some backwards Mario, or make the image look like it’s a VHS recording, etc.
Some people hate shaders because they feel like they change the game too much, ruining the intended art style. That retro games were made with the limitations of the hardware in mind. But then other people argue that these games don’t look how they were intended anyway, most of these consoles existed when CRTs were the main or only kind of display. A modern LCD will never look like a CRT, CRTs blurred the image, generated colors differently, had scanlines, etc. And some people just like smooth Mario. It’s personal preference, but the one thing that objectively might matter is that using a shader does have a performance hit which can matter when emulating more modern consoles at higher than original resolution.
There are 3 shader formats RetroArch has support for;
CG – “C for Graphics” Deprecated, RetroArch can still be built to support this format but your copy likely won’t be. There’s no reason to use this anymore.
GLSL – OpenGL Shading Language, this is the shader format that supports older OpenGL. If you are using any of the OpenGL video drivers this shader format will work.
Slang – The newest format which, if you can use it, you should use it. This works with OpenGL Core (but not older OpenGL), the Direct3D video plugins, and most importantly this is the shader format that works with Vulkan.
To use shaders, start the game you want to apply a shader to. Return to the menu while the game is running.
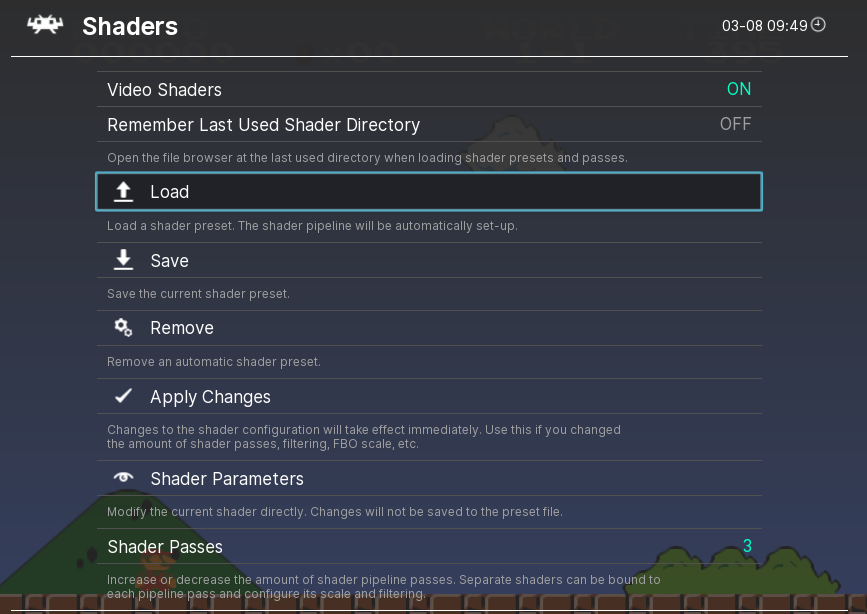
Main Menu > Quick Menu > Shaders (it’s near the bottom)
Set “Video Shaders” to “On”
Select a shader preset by pressing “Load” then select the folder for the shader type you want to use. If you choose a type that the video driver you’re using does not support all the folders will be empty.
Choose your preset, go back to the Shader menu, press “Apply Changes”
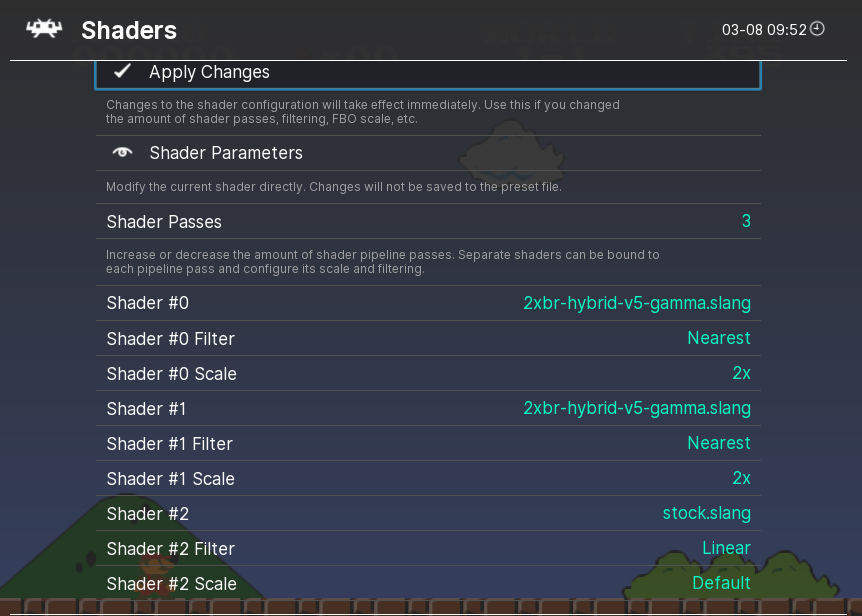
You can fine tune the shader options (how many passes, what kind of filter you want to apply) with the options at the bottom, but there should be a preset that does what you want without having to mess with this too much.
If you find a shader you like that you want to make default for that game, or every game that uses that core, or even every game in every core (you probably don’t want to do that last one. Shaders that look good on SNES don’t usually look good on n64) from the shader menu press;
Save > Save Core Preset (or Game Preset, or Global Preset)
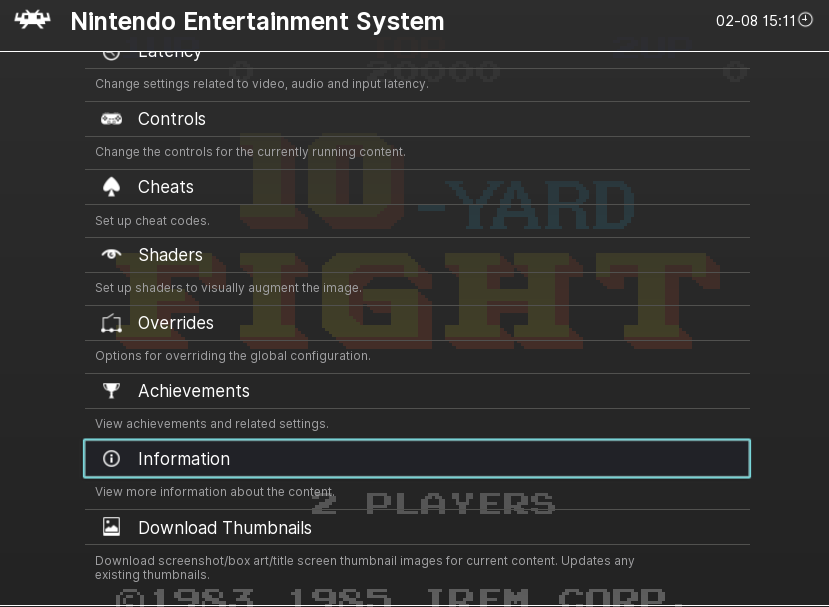
Core Options
From the Quick Menu (the same place we were to apply shaders and control remaps) there is an option called “Options”
This contains all core specific options for the current running core. It will be different for every core, it’s a good idea to look around here though, especially for 3d systems. For example, with PSX and N64 emulators this is where you’ll find the options to adjust the internal resolution the game runs at, most of these games look like garbage at their original resolution and can be easily run at higher resolutions.
Whatever core though, you can choose to set options for a specific directory or game by going to Options > Manage Core Options > Save Game Options or Save Content Directory Options
Conclusion
At this point, assuming I didn’t forget anything (which I probably did) almost everything should be playable and RetroArch should be configured well enough. There’s still more; netplay, the AI Service, Core specific options, but the important stuff is done.
What this means is that you can start RetroArch with a controller in hand, you’ll have all of your roms right there. All games will be configured in the same way. Nothing will require using a mouse, and if your hotkeys are set up properly you won’t need a keyboard either. You can jump from game to game easily even on different consoles without having to take your hands off your controller.
If you wanted to you could fine-tune the way you emulate games to an insane degree, you can do this with all emulators at once or individually. All of your emulators should have mostly the same features and the same UI.
Leave a Reply