Finetuning an AI Language Model on Consumer Hardware
As a followup to my guide on generating text locally with the AI language model GPT-Neo, this guide is going to cover how to finetune the same models with our own training data locally and using consumer hardware
As of right now the models ChatGPT uses (GPT 3.5) aren’t actually open source. They’re also much too large to run on any consumer hardware, let alone train. We can still accomplish something similar though by finetuning smaller, open source models such as GPT2 or GPT-Neo to either talk like our training data or just become aware of our training data. GPT-J is also technically possible but would need a computer with a very good, high vram GPU and more ram than anyone is likely to have unless they built specifically for this
There are some very easy ways to do this with one major problem. The traditional way of finetuning these models includes no memory optimizations. When you try to train anything but the absolute smallest models you will end up getting out of memory errors. I’m using a 4090 for this, on a 4090 with traditional finetuning methods I was able to finetune the smallest GPT-Neo model (GPT-Neo 125M) but immediately ran out of memory with GPT-Neo 1.3B
We can solve this problem though by using Microsoft’s DeepSpeed, DeepSpeed implements memory, activation, and gradient checkpointing along with memory reuse to drastically reduce the vram requirements. It is a major optimization for lowering the amount of vram needed to train larger models.
DeepSpeed doesn’t really build well on Windows. It’s possible, but it’s very hard to get it to build, especially with all the optimizations we need. And so because of that this isn’t really possible on Windows. Maybe it could be done with a lot of work, but I doubt it would be worth it. So, this guide is only for Linux. Some of the commands (specifically installing the CUDA toolkit) are written specifically for Ubuntu but should work for any distro with minor changes. If you have Windows, this does work in WSL2 Ubuntu on Windows 11 with absolutely no problems. It cannot work in WSL1 and is unlikely to work in WSL2 for Windows 10 because of changes made in Windows 11 for how WSL is able to access the host GPU
This guide is written for absolute beginners, and I try to explain every step even if it’s very simple. It does assume you have at least some familiarity with Linux, though
Computers with most modern, midrange Nvidia gpus should be able to train the smallest models (like GPT-Neo 125M.) Training GPT-Neo 1.3B or higher will need a better GPU though. It should work on GPUs with 16gb of vram or more, probably on GPUs with 12gb of vram and possibly even less, but I don’t have anything to test that on
If you have an AMD GPU it’s also probably possible but, since this uses CUDA, you’re on your own
I’ll be going over formatting training data too with awk, grep, and sed. But my examples are specifically for formatting training data from chat logs ripped from wechat and an ebook of the Daodejing and most of it will only work for that. All training data is formatted differently and will need to be prepared for training in different ways. But, still, it’s almost definitely possible with awk, grep, and sed. You just have to figure out how. Or you can do the same thing in Python, just with many more lines
Part 1: Environment Setup
Miniconda
We’re going to be using miniconda again, especially because we’re going to need to use a specific version of Python. So, start by installing miniconda
wget https://repo.anaconda.com/miniconda/Miniconda3-latest-Linux-x86_64.shGrab the install script and make it executable
chmod +x Miniconda3-latest-Linux-x86_64.shRun the installer, agree to the terms and install where you want. The default location is probably fine
./Miniconda3-latest-Linux-x86_64.sh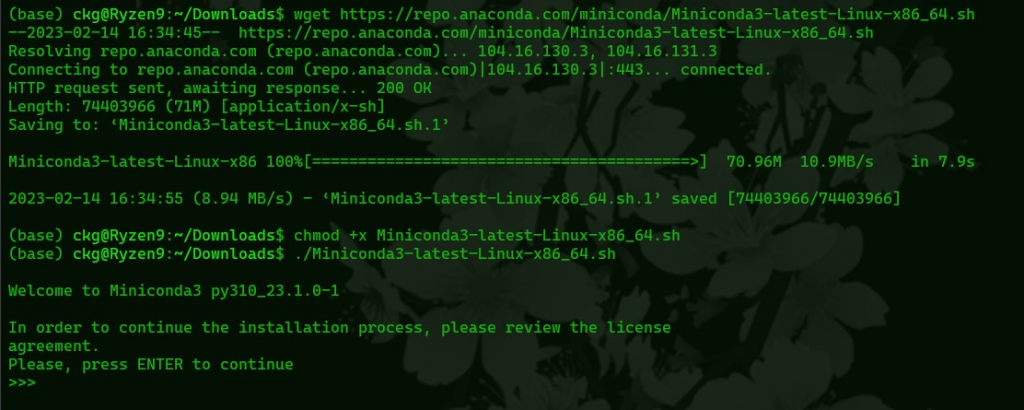
You should also install pip, which we will use for some packages, and git which we will use to clone repos, if you don’t have them already
sudo apt install python3-pip gitYou’ll also need the proprietary Nvidia driver on baremetal Linux, nouveau wont work for this
CUDA
Usually CUDA version mismatches are not a big deal, but here we want to be careful and make sure we get the right version of CUDA installed, a version that matches the version of CUDA our PyTorch is for. CUDA mismatches often cause DeepSpeed to fail to build
Since there are PyTorch builds for CUDA 11.7 that is probably what we should go with. Cuda 11.8 with the nightly PyTorch (which has a PyTorch for CUDA 11.8) will probably be faster on Lovalace GPUs but since it isn’t the stable branch there are more likely to be unexpected problems. We’re going to be downloading this directly from Nvidia and I’ll be using the Ubuntu install options, instructions for your specific OS are here
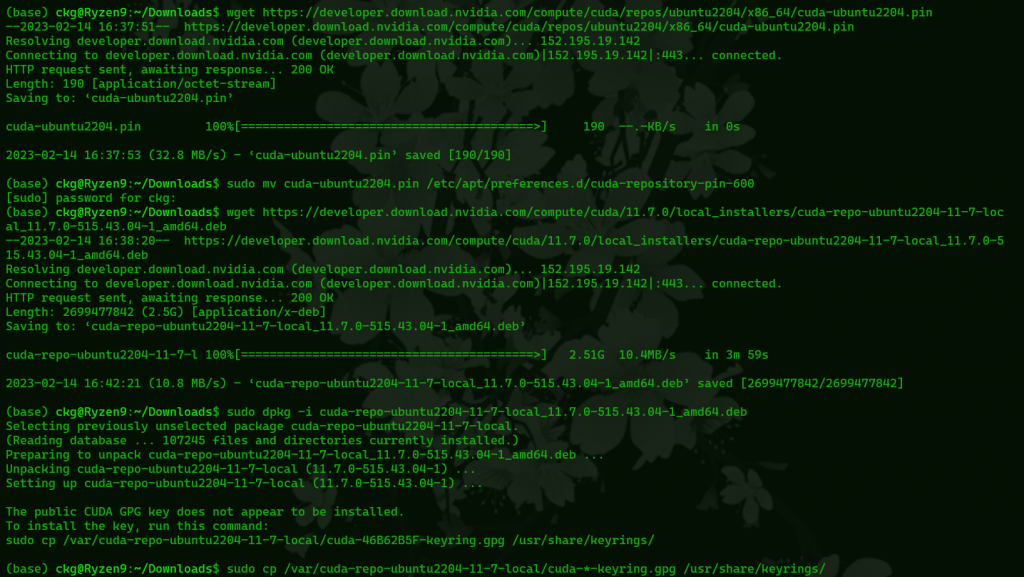
wget https://developer.download.nvidia.com/compute/cuda/repos/ubuntu2204/x86_64/cuda-ubuntu2204.pin
sudo mv cuda-ubuntu2204.pin /etc/apt/preferences.d/cuda-repository-pin-600
wget https://developer.download.nvidia.com/compute/cuda/11.7.0/local_installers/cuda-repo-ubuntu2204-11-7-local_11.7.0-515.43.04-1_amd64.deb
sudo dpkg -i cuda-repo-ubuntu2204-11-7-local_11.7.0-515.43.04-1_amd64.deb
sudo cp /var/cuda-repo-ubuntu2204-11-7-local/cuda-*-keyring.gpg /usr/share/keyrings/
sudo apt update
sudo apt -y install cuda-11-7 cuda-toolkit-11-7
If you’re using WSL you should replace
wget https://developer.download.nvidia.com/compute/cuda/11.7.0/local_installers/cuda-repo-ubuntu2204-11-7-local_11.7.0-515.43.04-1_amd64.deb
with
wget https://developer.download.nvidia.com/compute/cuda/11.7.1/local_installers/cuda-repo-wsl-ubuntu-11-7-local_11.7.1-1_amd64.deb for WSL Ubuntu
Now that CUDA is installed we probably have to set the environment variables for it. In my experience installing a specific version of CUDA doesn’t do that automatically. All we need to do is set them with these lines
export PATH=/usr/local/cuda-11.7/bin:$PATH
export CUDA_HOME="/usr/local/cuda-11.7"
export LD_LIBRARY_PATH="/usr/local/cuda-11.7/lib64:$LD_LIBRARY_PATH"
export PATH="/usr/local/cuda-11.7/bin:$PATH"
You can add this to your .bashrc if you want this to persist between reboots.
Once that’s all done we can make sure it’s working and CUDA 11.7 specifically is the version we are using with
nvcc -V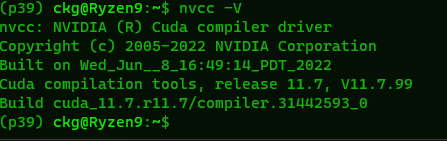
The output should look like this
Creating the Environment
We’re going to create and activate an environment with conda that specifically uses Python 3.9 We need to use this version or lower because DeepSpeed specifically requires triton 1.0.0, and that version of triton is not available from pip for newer versions of Python. You can name the environment whatever, I just went with p39 for “Python 3.9”
conda create -n p39 python=3.9
conda activate p39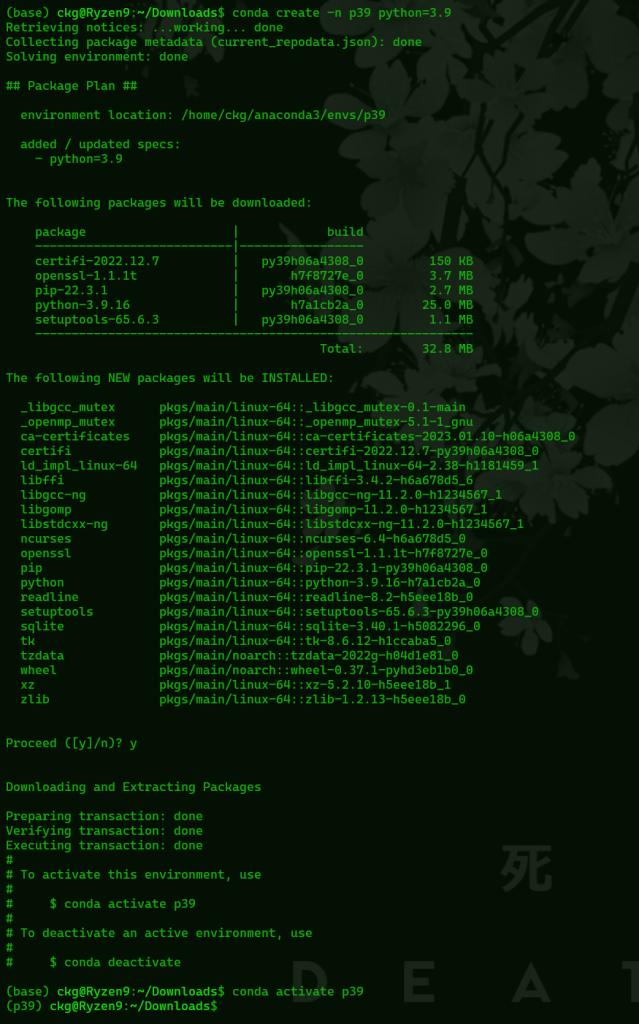
Now that we’re in our environment we need to install PyTorch, and again, since we have installed CUDA 11.7 we’re going to use PyTorch stable (1.13.1) for CUDA 11.7. If you went with CUDA 11.8 for Lovelace you will need to get the nightly version of PyTorch and install for CUDA 11.8. There are other ways you can install this, you can see the exact commands here but we’re going to use conda for this with the following command. Make sure our environment is activated when we do all this
conda install pytorch torchvision torchaudio pytorch-cuda=11.7 -c pytorch -c nvidia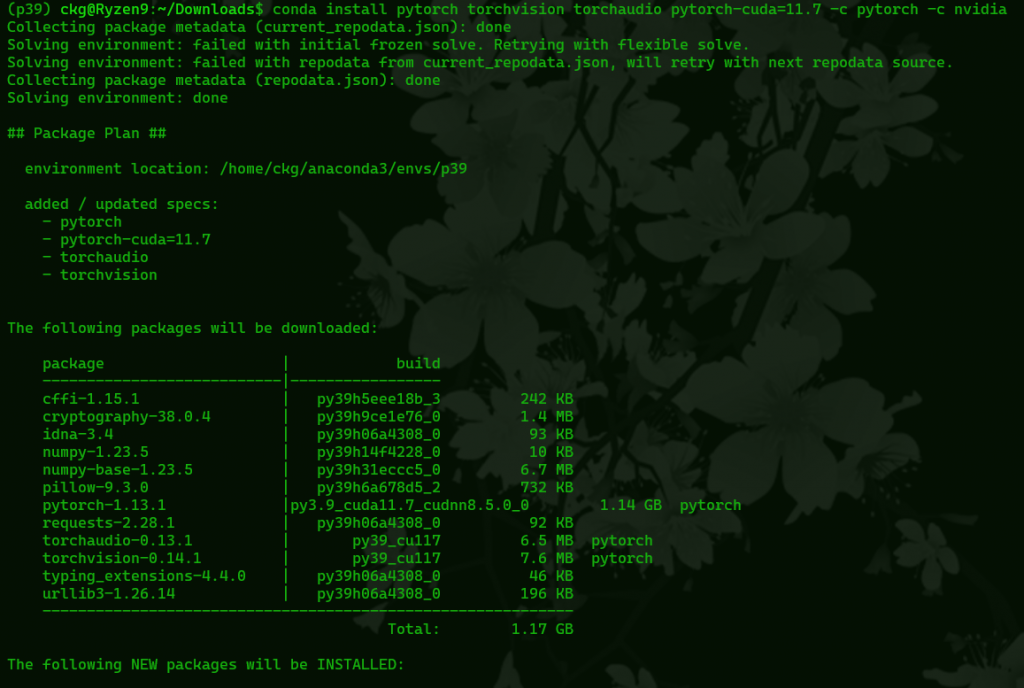
Now install triton 1.0.0, again, it’s very important that it’s this version, DeepSpeed will not build with any other version, if you are using a newer version of python, pip will complain that it can’t find that release
pip install triton==1.0.0DeepSpeed
Now move to a directory where you want to clone DeepSpeed to. It doesn’t matter where, wherever you feel like putting it. At the time of writing this guide DeepSpeed is at commit 349f845, in case things change in the future, that commit will work for this
git clone https://github.com/microsoft/DeepSpeed
Change to the DeepSpeed repo we just cloned
cd DeepSpeedWe need to build deepspeed without async_io. We wont use aio at all, and odds are you wont be able to build with async_io support without doing more work anyway. Otherwise we need to have all other ops installed.
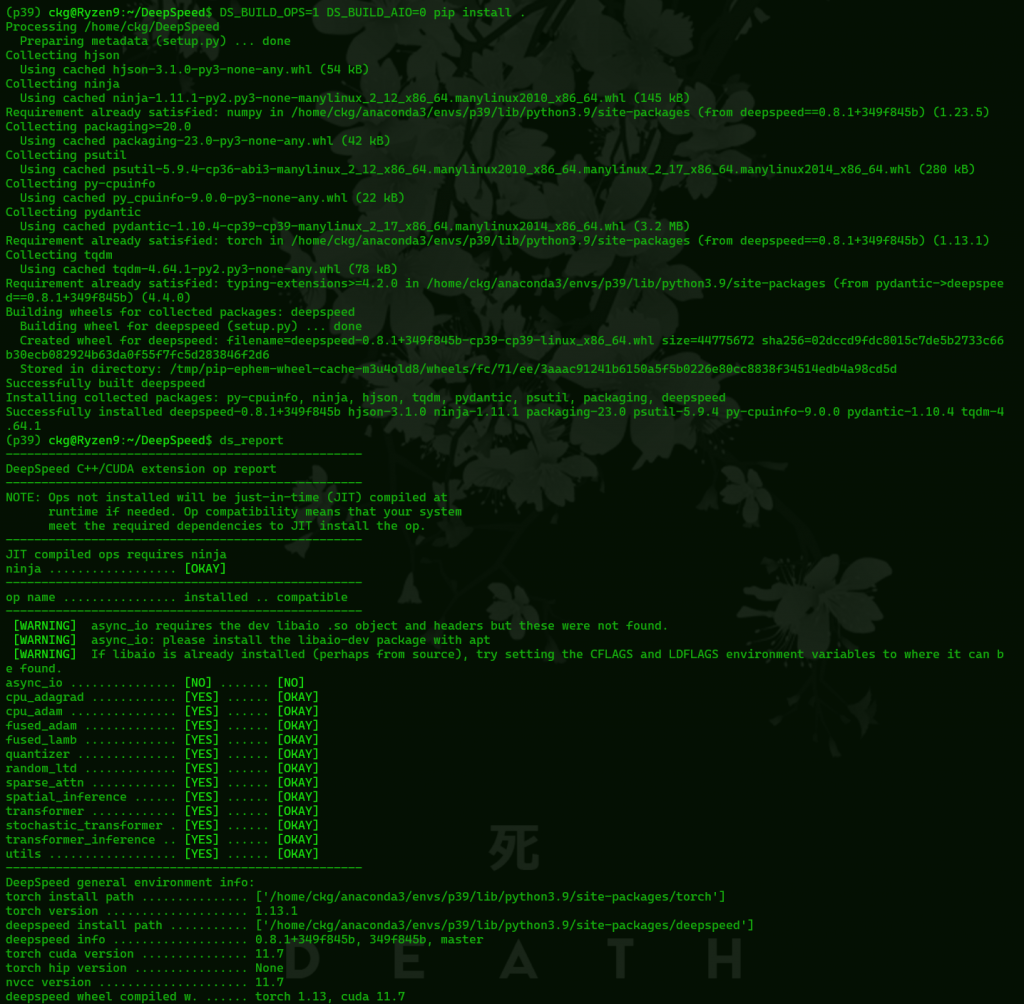
DS_BUILD_OPS=1 DS_BUILD_AIO=0 pip install .This will take a while, hopefully after it’s finished building we’ll have all ops installed besides async_io. After it’s done building check what installed with
ds_reportIt should look like this
You may need to set up a large amount of swap depending on how much ram you have. I didn’t need one for GPT-Neo 1.3B with 32GB of ram, but GPT-Neo 2.7B almost definitely will unless you have a very large amount of ram (probably over 70GB, potentially 96GB.) If you’re using a bare metal Linux install just follow your distro’s docs.
If you are using WSL2 you need to edit a file in your home directory (assuming your home directory is on C:, C:\Users\Username\) called .wslconfig. If you don’t have this file you can create it, it’s just a text file but with no extension.
You need to configure WSL2 to allow it to use all of your ram, and tell it how big the page file should be. For example, here is a configuration
[wsl2]
memory=32GB
swap=64GB
swapFile=D:\\temp\\swap.vhdx
memory= should be the total amount of actual ram you have
swap= should be the amount of swap you want to give WSL2
swapfile= tells WSL2 where to create a virtual hard drive for the swap partition. It will create this file when you start WSL2. Sometimes it doesn’t clear this file when you leave WSL2, this can be fixed by deleting the vhdx file it creates and restarting WSL2. the “\”s do need to be double here, that isn’t a typo.
You can then restart WSL2 by entering
wsl --shutdownin a normal command prompt (not from the distro running in WSL2 itself)
Then you can just restart your distro and it should reallocate the ram/swap
You can then check how much ram and swap is allocated to WSL2 with
free -hfrom inside Linux
Finetuning Repo
Leave the DeepSpeed directory and move to another directory where you want to clone a copy of the actual finetuning repo. This is where our models will end up, and where we will put our training data. Clone the repo with
git clone https://github.com/Xirider/finetune-gpt2xlChange into the finetune directory
cd finetune-gpt2xlNow install the remaining requirements for this repo with pip
pip install -r requirements.txtIn the end it should install all of these requirements

Part 2: Training Data
From here we can train, the repo includes sample data from the works of Shakespeare to train on. But we want to train on our own data. We’ll probably be working with a massive amount of data, so we’ll need to be able to edit it all. Doing this by hand would likely take an incredible amount of time, but we can edit it all pretty quickly using either a combination of awk, sed, and grep or writing scripts to do it for us in Python
What exactly you will have to do depends on what your training data starts out as in the first place, some things will be easier to edit than others. I’m going to start with chat logs from the chat program WeChat. The first part of this will be WeChat specific, but the later parts may be useful more generally
WeChat Specific Text Formatting
The first thing we need to do is actually get the chat logs from WeChat. This is a problem because WeChat logs are encrypted. The only way I found to get them in an unencrypted workable format involved proprietary, commercial software. There was no open source way that I could find. And, worse yet, this software only works on Windows and costs 200rmb. Regardless, depending on whether you’re extracting logs from a phone or the WeChat PC version and whether you’re ok with Chinese or not you can get software to do this at
https://www.coksoft.com/wechatextractor.htm
or
https://www.louyue.com/pcwx.htm
Luckily for most other kinds of logs you won’t need to do anything as drastic. They are probably already in plaintext, like IRC logs for example.
Now we have an htm file with our chat logs. We need to convert this htm file to text before we can use it to train our model. There a couple ways to do this.
We can do it with python with the Beautiful Soup package which allows Python to parse html. You can get Beautiful Soup with
pip install beautifulsoup4Then implement it into a python script to convert the html to text like this
from bs4 import BeautifulSoup

with open("msg.htm", "r") as html_file:
    html_contents = html_file.read()

soup = BeautifulSoup(html_contents, "html.parser")

text = soup.get_text()

with open("training.txt", "w") as text_file:
    text_file.write(text)
Obviously replace msg.htm with whatever your html file is called, and training.txt with whatever you want your output to be named.
If we do it this way we get a lot of empty lines in our output. This is not a big problem but it will affect how the next step works so we’ll want to remove all the empty lines here first. There is a grep command later on that will do this.
Or, if we don’t want to mess with Python, the easiest way is to just open the text in a browser, copy it, and paste it into a text file.
Now we have all of the chat logs, maybe from a group chat. The problem now is it includes usernames, userIDs, and time stamps for everyone. We don’t want those usernames and time stamps in the training data and I wanted to train on the messages from just one person. Also, in WeChat logs the username and time stamps are on one line with the person’s messages on the next.
So, what I did was use awk to look for any line with a specific username or userID then go to the very next line, copy that line to another text file, then do the same throughout the rest of the document. This is the awk to do that
awk '/username/ {f=NR} f && NR==f+1' file > train.txtIt is probably better to use userIDs instead of usernames, if you use usernames it will also find lines that mention that user and copy the line after that. These lines will almost definitely be lines with another username, userID, and time stamp so they’re easy enough to clean up anyway if we have to.
You can also do this in a bunch of different ways with Python, for example
from collections import defaultdict
from contextlib import suppress
from datetime import datetime


def parse_logfile_lines(file_name, user_conditional, user_parser):
    """Yield usernames associated with lines of text in a log file."""
    user = None
    with open(file_name, 'r') as fi:
        for line in fi:
            line = line.strip()
            if user_conditional(line):
                user = user_parser(line)
            else:
                yield user, line


def extract_user_from_line(line, separator=' '):
    """Extract the user portion from a line, which is all but the last two elements."""
    return ' '.join(line.split(separator)[:-2])


def line_ends_with_datetime(line, separator=' '):
    """Return True if the last two parts of a line contain a datetime.

    Return False if the last two parts of a line cannot convert to a datetime
    or if the line has less than three parts.
    """
    line_split = line.split(separator)
    with suppress(ValueError):
        datetime.fromisoformat(separator.join(line_split[-2:]))
        return len(line_split) > 2
    return False


def split_logfile_by_user(file_name):
    """Map all users to all of their lines of text in a log file."""
    result = defaultdict(list)
    for user, line in parse_logfile_lines(file_name, line_ends_with_datetime, extract_user_from_line):
        result[user].append(line)
    print(result)


split_logfile_by_user('test.txt')
This is just one way to use Python to sort all the messages in a WeChat log by user. The output of this would need more sorting to add linebreaks and remove some other stuff to make it suitable for training data which could be done by either modifying the script or further editing the output with awk, sed, and grep.
So, now we’re working from another file. Most of these commands have a way to update the original file, like the -i option in sed, but that’s a little risky. If you mess it up then you have to start over. It’s up to you
Now, since we probably have some of those extra lines because of mentions we have to clean it up further. One way to do this is to look for any line with a timestamp and delete that line. We can do this with either grep or awk
With grep it looks like this, the first grep command being if we want to move it to another file and the second if want to use tee to write the output back into the original file. As always, replace filenames with whatever your training data is called and with whatever you want the output file to be called.
grep -vE "^[0-9]{4}-[0-9]{2}-[0-9]{2} [0-9]{2}:[0-9]{2}:[0-9]{2}" file.txt > output.txt
grep -v '20[0-9][0-9]-[0-9][0-9]-[0-9][0-9] [0-9][0-9]:[0-9][0-9]:[0-9][0-9]' file.txt | tee file.txt
We can do the same thing with awk. If we want to update the original file we have to send it to a temp file then move the temp file over the original file which I think is kind of gross but either way it would work like this
awk '!/20[0-9][0-9]-[0-1][0-9]-[0-3][0-9] [0-2][0-9]:[0-5][0-9]:[0-5][0-9]/' file.txt > temp.txt && mv temp.txt file.txtNow, we want to remove stickers. This is not going to work if the logs you plan to be training on are written in Chinese. For me though, the logs I wanted are all in English. Stickers in wechat are a line of Chinese, so I thought the best way to remove the stickers was to remove any line with Chinese. You can use grep to do this
grep -P -v '[\x{4e00}-\x{9fa5}]' train.txt > train1.txtGeneral Text Formatting
The following parts aren’t just useful on WeChat logs but probably useful to more kinds of logs or training data in general. Still, other kinds of text might not work exactly like this so you’ll have to do whatever fits how your data is formatted.
The logs are pretty clean now but there are still some empty lines. There is no reason for them to be there for this and it will cause problems later when we try to add a training specific terminator in between lines so it’s best to just get rid of them here. We can use grep to do this
grep -v '^[[:space:]]*$' train1.txt > train2.txtSome lines have URLs in them. I don’t really consider that the person we’re training it to speak like “talking” so I removed those with sed, too
sed -i 's/http[^ ]*//g' train2.txtNow, the WeChat logs have a few empty spaces before each line. This is also going to cause problems when we add our trigger word so we can get rid of them too with sed
sed -i 's/^[ ]*//g' train2.txtAt this point we could use this as our training data but there are still a few things left that would probably make it not work how we wanted it to work. If we train it on what we have now it would learn what we trained it on, but it wouldn’t know what exactly to do with it. We want it to speak like the person in our training data.
Transformer models are technically all text completion models. That is, you send them a prompt and they try to figure out the next word. For example, if you send it the prompt
I am a
it will respond with something like
I am a boy
All transformer models work this way, even chatbots. So, how do you get it to actually act like a chatbot? You send an example of a conversation with the prompt including the users input and then an empty chat response for it to complete like
user_input = input
prompt:
A: Hi
B: Nice to meet you
A: user_input
B:
And there the AI “completes” for “B:”
But what does “B” sound like? “B” is just general and it has no idea of what “B” is like so it will respond however. But what if we put someone else there? If we replace “B” with “Einstein” and give it an example of Einstein saying Einstein stuff? Then, it will try to sound like Einstein.
But the AI has no idea who the person we’re training it on is, it has no idea that the training data even belongs to a single person or anything. So then what can we do? We need to create a “person” for it speak as, a person’s messages for it to “complete”
We do this by creating a trigger word that we will put in front of each message in our training data. That way when we call that trigger word in our prompt the AI knows what style it needs to take on in its output. There aren’t really any rules to what your trigger word needs to be. I feel like you should pick something that doesn’t already exist as a concept it knows in order to avoid its already existing memory interfering with the output but I haven’t tested that and I don’t know for sure. That’s how it works with training image generator AIs so it is possibly the same here. For this example I chose the word “responseuser1:” and I’m going to use awk to put that behind each line in the training data
awk '{print "responseuser1: " $0;}' train2.txt > train3.txtNow we have one more thing to deal with. How does the AI know where one message ends and another begins? What’s to stop it from outputting “I’m fine how are you? responseuser1: I’m fine too, thank you?”, at this point, absolutely nothing.
There is a terminator though that we can add in between each line,<|endoftext|> . It tells the model “this is where one block of text ends and another begins.” This is only used in training, the AI itself isn’t trained on it (and in fact, most transformer models have trouble even saying this word. Go ahead and ask ChatGPT to say the word <|endoftext|>, it won’t read it and it will think you wrote empty space.)
Since, in these chat logs, each message is on its own line we can just add <|endoftext|> in between each line. We can do this with sed. This command also puts spaces around <|endoftext|> which may be necessary for some kinds of training data, as if there isn’t a space in between the last character of a line and the token the AI may interpret it as a part of the word instead, and it will show up in your output.
sed -e 's/$/ <|endoftext|> /' -i train3.txtThe training data may have some special, unprintable characters in it that we don’t actually want. For example, my daodejing data had a lot of — characters in it. These can be artifacts of converting data in some formats to plain text. We can remove these with sed to make the data cleane
sed 's/[^[:print:][:space:][:punct:]]//g' train3.txt > train4.txtNone of these awk, grep, or sed commands have any output they display when you run them, so you just know they worked by checking the output file/modified file

Other Types of Training Data
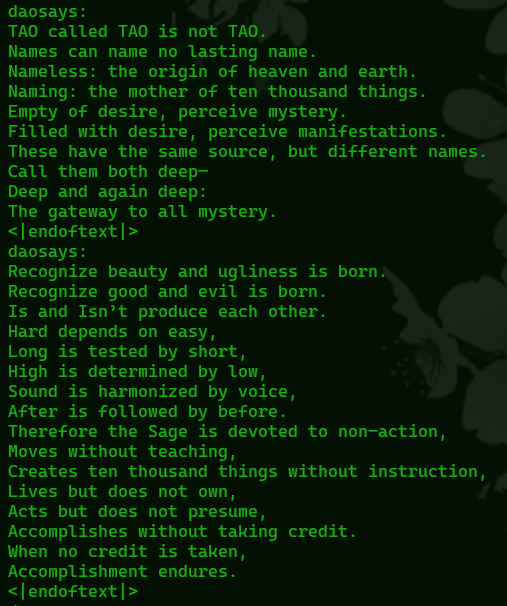
What we just did really only works for chat logs, and really only chat logs formatted in a certain way. What if you have text where one “message” covers multiple lines? Or where the terminator needs to go after a block of text and not after every line? Here is an example of text extracted from the Stanley Lombardo translation of the Daodejing. Since it’s in verse, each verse covers multiple lines.
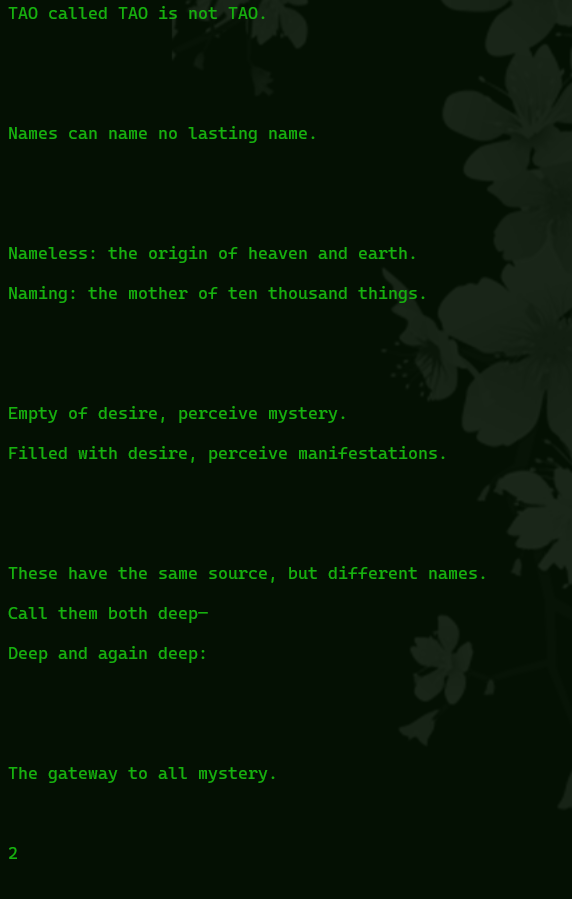
It has so many empty lines and numbers in between each verse
What I did with this was first remove the empty lines with the same sed command I used earlier. Then, since the numbers are in between each verse I figured I could use those numbers to edit it. I replaced each number with an <|endoftext|> terminator and then, because each terminator is placed before the next verse starts I added the trigger “daosays:” to the line below each <|endoftext|>. I used sed to do this and it looked like this
sed -e '/[0-9]/{s/^.*$/<|endoftext|>/;p;s/^.*$/daosays:/}' file.txtI still had to go in and manually add a few in, but it was not a lot and if it would have saved me any time I could have just as easily done it with sed, too. But in the end I had edited the original text to look like this
This can now be saved in the finetune repo directory as train.txt, or really anything we want to call it, we can point it to the right file later in our training script
Validation File
The validation file is just a small text file with a sample of the text we’re training the model on. So, for the Daodejing example it would be one verse. We save this as validation.txt in the finetune repo directory (or again, whatever we want as long as we point to it in the training script.) It should look something like this in the case of the Daodejing
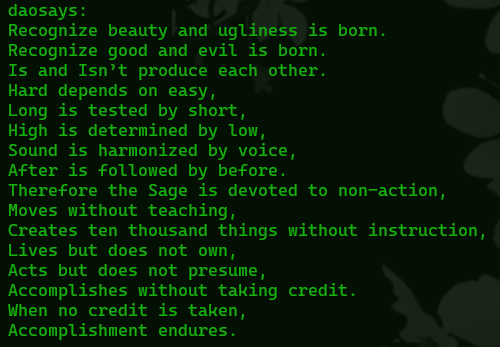
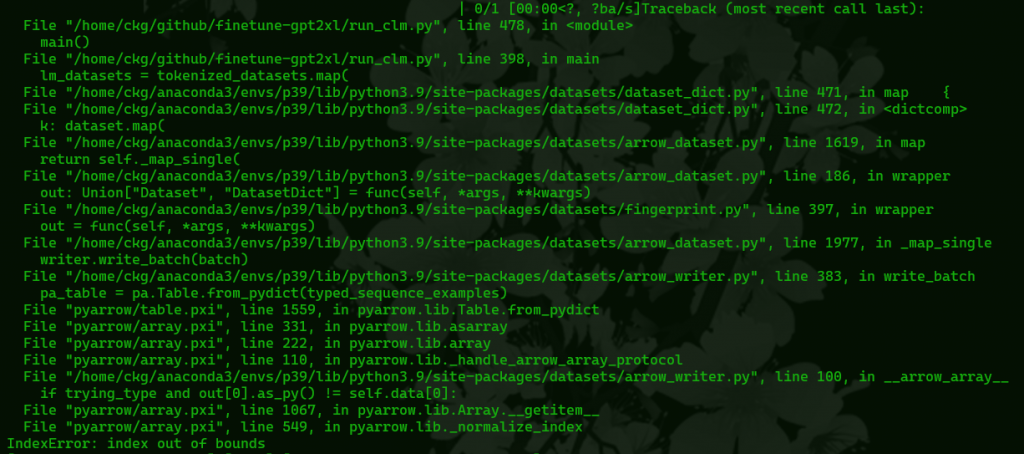
If you are training on something with a lot of small samples, you will likely have to include several examples in your validation file! For example, one verse of the Daodejing is too short. One message from a chat long is much too short. This is not documented anywhere as far as I can find so I don’t know exactly how long it has to be. If it’s too short datasets will give an “index out of bound” error when you attempt to train.
Convert train.txt and validation.txt to csv
Technically we can train straight from a text file. The problem is, dataloader, which this uses doesn’t interpret line breaks correctly and so will read it all as one very long line. It doesn’t have this problem with csvs.
the finetune repo contains a python script to convert train.txt and validation.txt. Just make sure those two files are in the finetune-gpt2xl (you’ll have to modify this if you named them something else) and run
python text2csv.pyThis should return “created train.csv and validation.csv files” and you’re good to go
Part 3: Training
Training Script
We’re going to need to make a shell script now in the finetune-gpt2xl that calls DeepSpeed and sets our configuration for our training. A basic training script for finetuning GPT-Neo 1.3B will look like this
deepspeed --num_gpus=1 run_clm.py \
--deepspeed ds_config_gptneo.json \
--model_name_or_path EleutherAI/gpt-neo-1.3B \
--train_file train.csv \
--validation_file validation.csv \
--do_train \
--do_eval \
--fp16 \
--overwrite_cache \
--evaluation_strategy="steps" \
--output_dir finetuned \
--num_train_epochs 1 \
--eval_steps 15 \
--gradient_accumulation_steps 2 \
--per_device_train_batch_size 4 \
--use_fast_tokenizer False \
--learning_rate 5e-06 \
--warmup_steps 10
This would also work on GPT-2 or probably most models by just changing the model name.
Some of these are self-explanatory
“–fp16” tells the training process to use mixed-precision training with 16-bit floating point numbers instead of 32-bit floating point numbers. This reduces the amount of vram we need to finetune the model and increases training speed by quite a bit. Because we’re using consumer hardware we want this.
“–evaluation_strategy=”steps” ” Evaluates the model after the specific number of steps specified by “–eval_steps 15” This doesn’t affect the quality of the output at all and is really useful for tracking the model’s progress while training. You have other options here besides “steps”, “no” and “epoch”
If you set this to “no” it will still save a checkpoint after each epoch because that’s the default in the Hugging Face library. So if you really want it to save no checkpoints (and there are good reasons for this. I suspect the checkpoints aren’t useful with with the defaults for datasets and cause crashes when datasets tries to reuse cached data) you have to add
--save_strategy "no"to your training script as well
“–output_dir finetuned ” Just says where the model will be built and end up after we’re done finetuning
“–num_train_epochs 1 ” This one is important and has a large impact on our final model, as well as how long it takes us to train the model. Higher values here take longer to train. Specifically, this is the number of times each example in the training date will be iterated over. With a training epoch of 1, the model will see each example in the training data once. This needs to be higher for smaller models which just have more trouble learning from smaller samples. We can also set it higher if we really want to force the model to speak like our training data. If we set this too high we’ll end up overfitting the model and it will have a lot of trouble deviating from exactly what’s in the training data.
“–gradient_accumulation_steps 2” While training, the model is updated by calculating changes (these are the gradients.) This tells the model how many batches of data to accumulate before updating the model. In general, higher settings require less vram, but train more slowly. Higher values can also stabilize training because it’s less sensitive to noise in the larger batches as well as improve the model’s ability to generalize since the gradients are computed on bigger batches.
“–per_device_train_batch_size 4” This is how many examples the model will process at a time while training. This is multiplied by the number of GPUs. Larger values here can make training faster, but it will require more vram. What you set this to depends on how much vram you have, how large the model you’re finetuning is, and how big your training data is.
“–use_fast_tokenizer False ” When you send words to a model it doesn’t actually use the words, it converts the words to tokens, then it generates tokens and the tokens are converted back into words. the fast tokenizer is a newer implementation of this process. It is, as the name implies, faster. But, it’s also less accurate and so we’re probably not going to want to turn this to true unless accuracy is unimportant or the training data is very simple.
“–learning_rate 5e-06” This sets how fast or how slow the model learns during fine tuning. If it’s set high, we’ll be making bigger changes to the model. If it’s set too low, we’ll only be making minor changes. This is another setting where it really depends on our training data and on which model we’re training. Setting this too high may cause the model to start diverging and make a lot of errors. It’s generally best to start small and gradually increase it until you get the results you want. Though, since we’re training on consumer hardware that might be a long process.
5e-06 is scientific notation, the number comes out to 0.000005
“–warmup_steps 10” The model will increase the learning rate gradually from a very small number to our final learning rate over 10 steps. This can help prevent the model from getting stuck in a poor state. The larger your model and the larger your training data, the higher number of warmup steps you need. Though, if you set it too high that can possibly lead to overfitting.
Whatever your settings, save the script as something.sh in the finetune-gpt2xl directory. If for some reason you’re editing it in Windows make sure you save it with unix line endings, you’ll get weird errors the other way. I’m going to go with training.sh, and make it executable
chmod +x training.shAnd now just run your script and let it train. Depending on your hardware and the size of your training data this can take a while and your computer will not be able to do anything well while it’s running.
./training.shIf you don’t already have the model, or you haven’t put it where transformers caches its models, it will download it before training

With any luck things wont break and eventually it will ask us if we want to use wandb to visualize our results. This is unnecessary but if you’re interested you can check out what it does at wandb.ai
Otherwise, just type 3 and continue. We will still get an output showing us our resoluts from wandb after we train regardless.

Eventually you will get a progress bar and an time estimate, it’s at this point that the model is actually training. So, just let it run and try not to touch anything
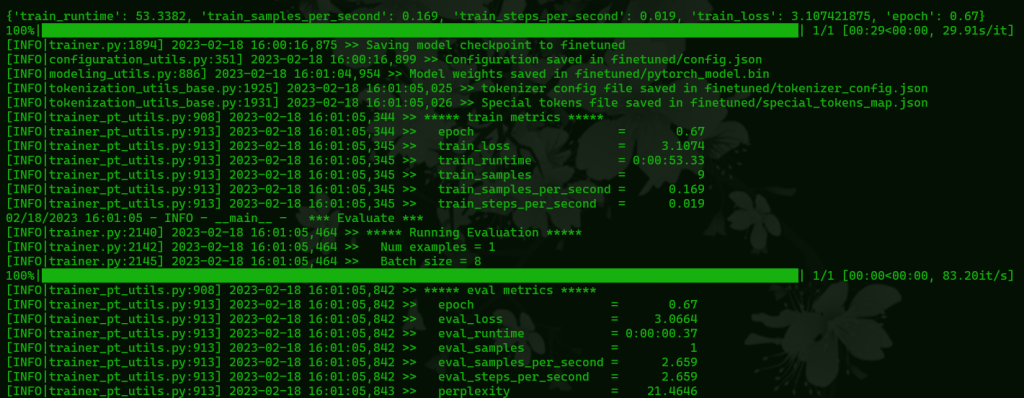
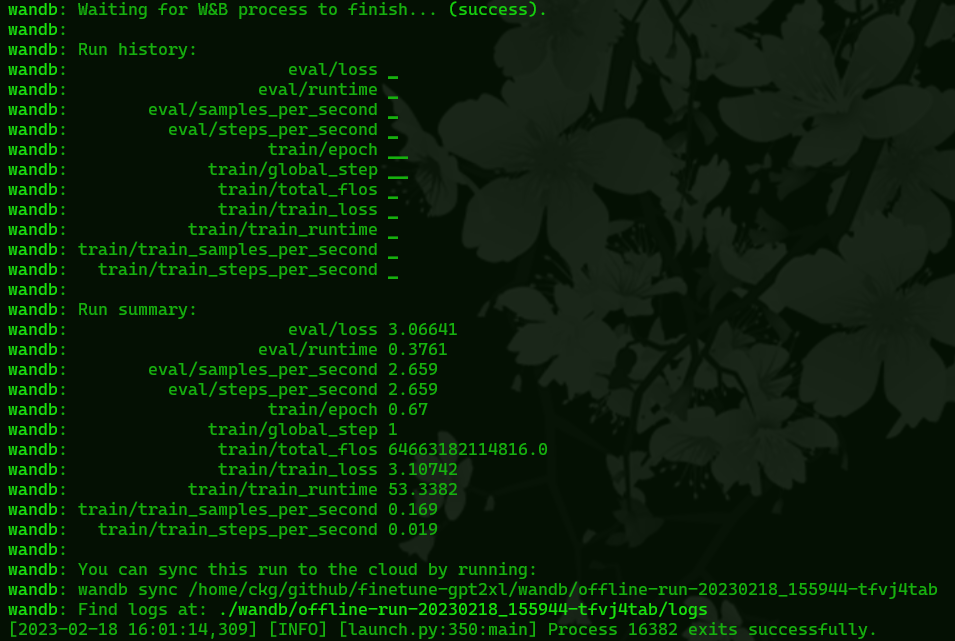
Once it’s done training you will get a report from wandb, this can be useful diagnostic information if something seems wrong with your model. Though if the training data’s impact is just too weak or too strong that is more likely a result of your settings in the training script and you’ll need to modify some of the settings mentioned earlier.
Your model will now be in the finetuned directory inside the finetune-gpt2xl directory. You can move it to a more convenient place to use it with your project. You will have to empty out the finetuned directory to train another model, it wont train if there’s already data in that directory.
Using the Model
To use it in your GPT script you can specify the model’s location with
model_path = "path/to/model"This can be an absolute or relative path, but with the obvious limitation that comes from a relative path (it needs to be relative to where you’re running the script from)
Now, run the script with your new model. You can use the trigger word we finetuned the model with to tell it “generate text in this style.” Like mentioned earlier, have your script pass a prompt to the model like;
conversation example
users prompt
trigger word:
And then filter the those parts from the output to hide them from the user.
You can leave your training environment with
conda deactivateAnd enter it again to do more fintetuning with
conda activate p39
Leave a Reply